How to Replace an Interior Door: 5 Easy Steps 2025
Why Updating Your Interior Doors Matters
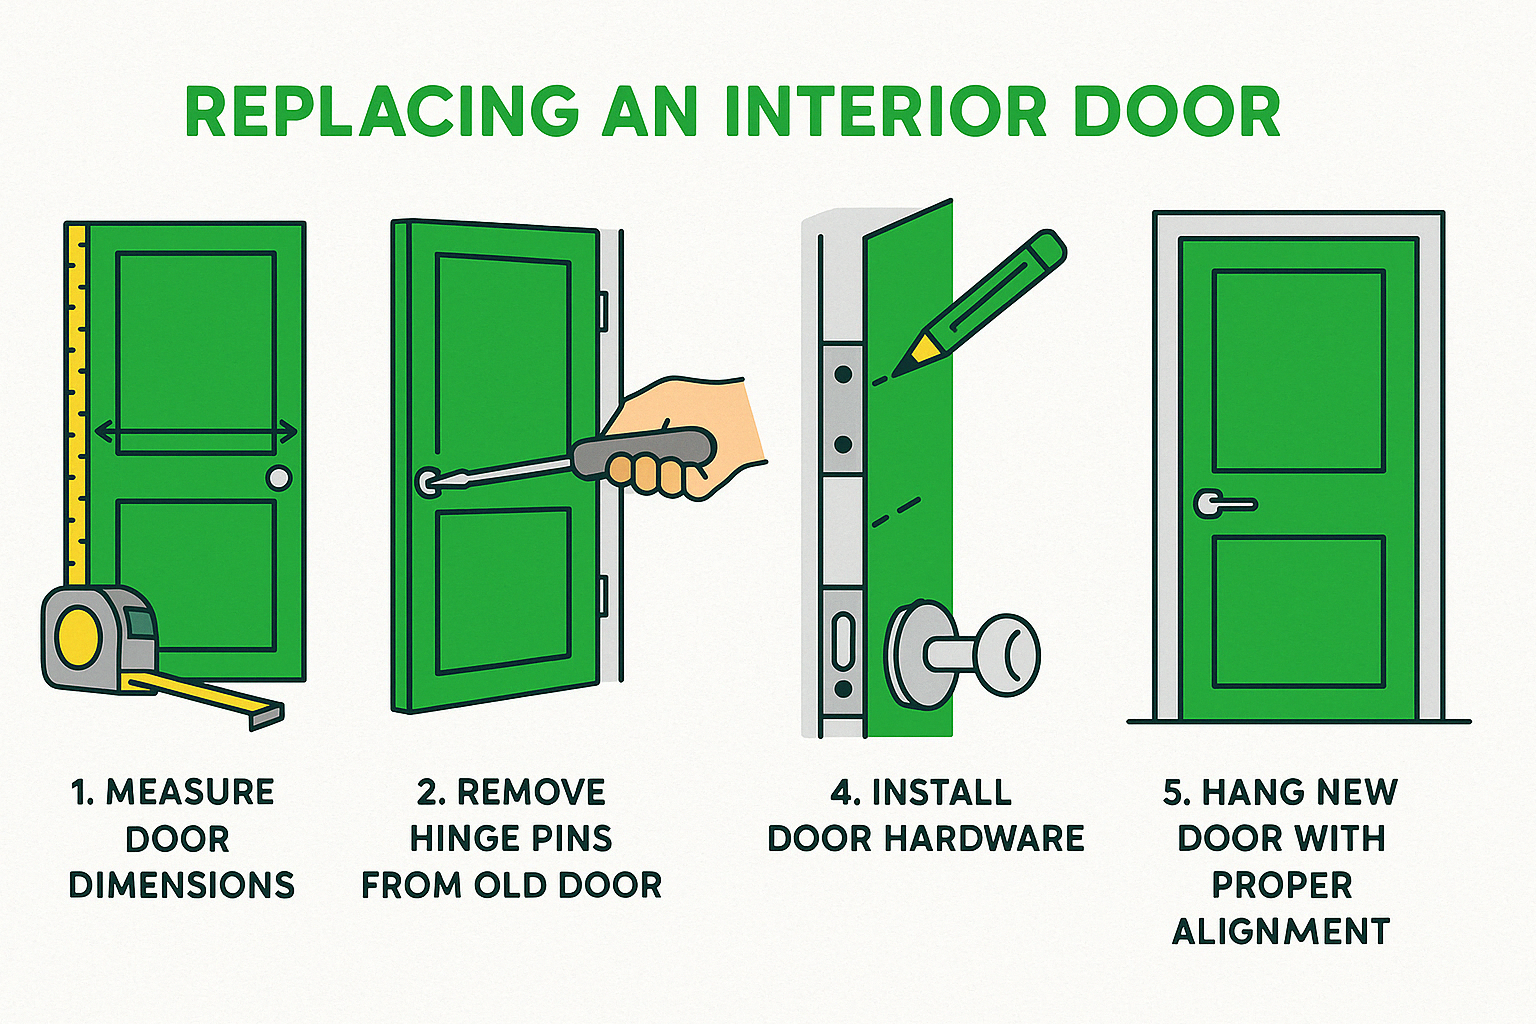
How to replace an interior door is a home improvement project that can dramatically transform your living space. If you’re looking for the quick answer, here’s how to do it:
- Measure your existing door (height, width, thickness)
- Choose between a slab or prehung door
- Remove the old door by taking out hinge pins
- Prepare the new door (mark hinge locations and trim if needed)
- Install hardware (hinges, lockset)
- Hang the new door and test for proper operation
Interior doors play a crucial role in your home’s appearance and functionality. They define spaces, provide privacy, and contribute significantly to your home’s overall aesthetic. Yet they’re often overlooked during renovations.
Replacing an outdated or damaged door can make a surprising difference in how a room feels. Whether you’re dealing with a hollow core door that doesn’t block sound effectively, a warped door that doesn’t close properly, or simply an outdated style that doesn’t match your decor, a replacement project is more manageable than you might think.
The good news is that replacing an interior door is a project most homeowners can tackle themselves with basic tools and some patience. It typically takes between 2-6 hours to complete, depending on your experience level and the complexity of the installation.
I’m Eryk Piatkowski from K&B Direct, where I’ve helped countless homeowners successfully steer how to replace an interior door with our quality products and practical guidance since 2011. My experience has shown that door replacement is one of the most impactful yet accessible home improvement projects for enhancing both function and style.
Understanding Door Types: Slab vs. Prehung Doors
When you’re planning to tackle an interior door replacement, one of the first decisions you’ll face is choosing between a slab door and a prehung door. This choice will shape your entire project, from the tools you’ll need to the time you’ll spend.
Slab Doors
A slab door is just what you might picture – the door itself, without any extras. No frame, no hinges, no hardware. It’s like buying just the canvas without the frame for a painting.
These doors are perfect when your existing door frame is in good shape but the door itself has seen better days. Maybe your current door is damaged, outdated, or just doesn’t match your style anymore.
“When you’re working with a slab door, you’re using the existing door frame,” explains Ron Hazelton, a home improvement expert. “This approach works well when your current door frame is in good condition, but the door itself needs replacing.”
With a slab door, you’ll need to be comfortable with some precision work. You’ll need to measure and mark hinge locations, chisel out mortises, and drill holes for the lockset. It’s a bit more hands-on, but it also gives you more control over the final result.
Prehung Doors
Think of a prehung door as the convenience option. It comes as a complete package – the door is already mounted in its frame with hinges attached, and often the holes for the lockset are pre-drilled. It’s ready to slide into your wall opening, like a piece of furniture that comes fully assembled.
“Prehung doors are typically easier for DIY enthusiasts because much of the precision work has been done for you,” notes Tom Silva, an experienced contractor. “They’re particularly useful when the existing door frame is damaged or when you’re creating a new doorway.”
While prehung doors simplify the installation process, they do cost more. You’re paying for convenience and the additional materials. They’re also bulkier to transport and handle during installation.
| Feature | Slab Door | Prehung Door |
|---|---|---|
| Components | Door only | Door, frame, hinges |
| Best for | Replacing door in good existing frame | Replacing door and frame, new doorways |
| Installation difficulty | Moderate to difficult | Easy to moderate |
| Precision required | High (for hinge mortising, etc.) | Lower (pre-assembled) |
| Cost | Lower ($100-$300) | Higher ($150-$500+) |
| Installation time | 2-4 hours | 2-6 hours |
| Adjustability | Can be trimmed to fit | Limited adjustments possible |
At K&B Direct, we’ve helped countless homeowners in Chicago and Schiller Park choose between slab and prehung doors. We find that slab doors are perfect for budget-conscious DIYers with some woodworking experience, while prehung doors are ideal for those who want a quicker, more straightforward installation.
The right choice depends on your existing door frame’s condition, your comfort level with tools, and your budget. We’re happy to walk through these considerations during a consultation to find the perfect match for your home.
Tools and Materials Needed for Replacing an Interior Door
Getting ready to replace your interior door? Having everything you need before you start will save you from those frustrating mid-project trips to the hardware store. I’ve helped many homeowners through this process, and proper preparation makes all the difference.
Let’s talk about what you’ll need to get the job done right:
For tools, you’ll want to gather a measuring tape, pencil, and both Phillips and flathead screwdrivers. You’ll also need a hammer, drill with various bits, and a set of chisels for creating those hinge mortises. Don’t forget a utility knife, level, and a speed square to keep everything, well… square!
If you’re working with a slab door, you’ll likely need a saw (circular, table, or hand) and possibly a plane for trimming the door to fit perfectly. A few clamps will be incredibly helpful for holding things steady while you work. And please, always wear safety glasses and work gloves—your eyes and hands will thank you.
As for materials, you’ll need your new door (either slab or prehung), hinges (if not included with a prehung door), and a lockset or doorknob. If you’re installing a prehung door, grab some wood shims for proper alignment. You’ll also want finishing nails or screws, wood filler for any gaps, and sandpaper for smoothing rough edges.
A door lock installation jig is something many people overlook, but it’s worth its weight in gold when drilling perfectly aligned holes for your lockset. If you don’t want to purchase one for a single project, many hardware stores offer tool rentals.
“Pro Tip: If you’re measuring down to 1⁄32, you’ll be paying extra for a custom sized door at that point,” advises an experienced designer. “Standard sizes can often be trimmed slightly to fit, saving you considerable expense.”
Planning to finish the door yourself? Don’t forget to pick up paint or stain that matches your home’s interior aesthetic. At K&B Direct, we often recommend buying slightly more than you think you’ll need—better to have a little extra for touch-ups than to run short.
How to replace an interior door becomes much simpler when you’re properly equipped. If you’re unsure about any tools or materials for your specific project, our team at K&B Direct is always happy to provide personalized guidance. We’ve guided countless Chicago-area homeowners through successful door installations, and we’re just a phone call away if you need advice.
How to Replace an Interior Door: Step-by-Step Instructions
Ready to transform your space with a new interior door? I’ve guided hundreds of homeowners through this process, and I promise it’s more manageable than you might think. Let’s walk through how to replace an interior door together, covering both slab and prehung options so you can tackle this project with confidence.
Step 1: How to Measure Your Existing Door and Doorframe
Getting accurate measurements is the foundation of a successful door replacement. Think of it as the blueprint for your entire project – rush this step, and you’ll likely face headaches later.
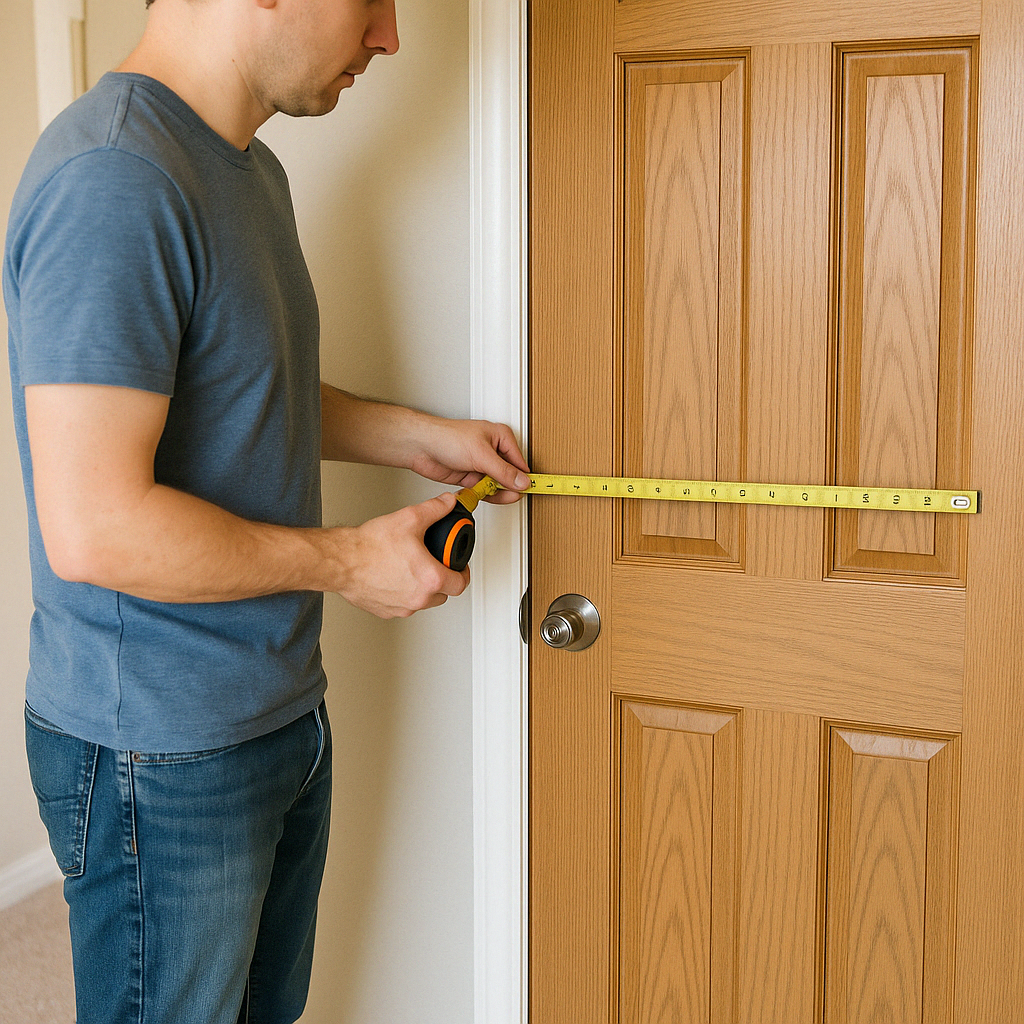
For a slab door, you’ll need to measure the height, width, and thickness of your existing door. Standard interior doors typically stand 80 inches tall (that’s 6’8″), but I’ve seen plenty of older Chicago homes with non-standard sizes. Measure the width at three points—top, middle, and bottom—and use the smallest measurement to ensure your new door fits properly. Most interior doors come in standard widths of 24″, 28″, 30″, 32″, or 36″, with a thickness of 1⅜”.
Don’t forget to determine your door swing direction! Simply stand with your back against the hinges—if the door opens to your right, you have a right-hand door; to your left, a left-hand door. You’ll also want to note the exact hinge locations and lockset position, as you’ll need to transfer these to your new door.
For a prehung door, your focus shifts to the rough opening. Measure between the studs for width, from floor to header for height, and check your wall thickness to ensure the jamb depth matches. As one of my customers once joked, “Measure twice, buy once, and avoid that second trip to the store!”
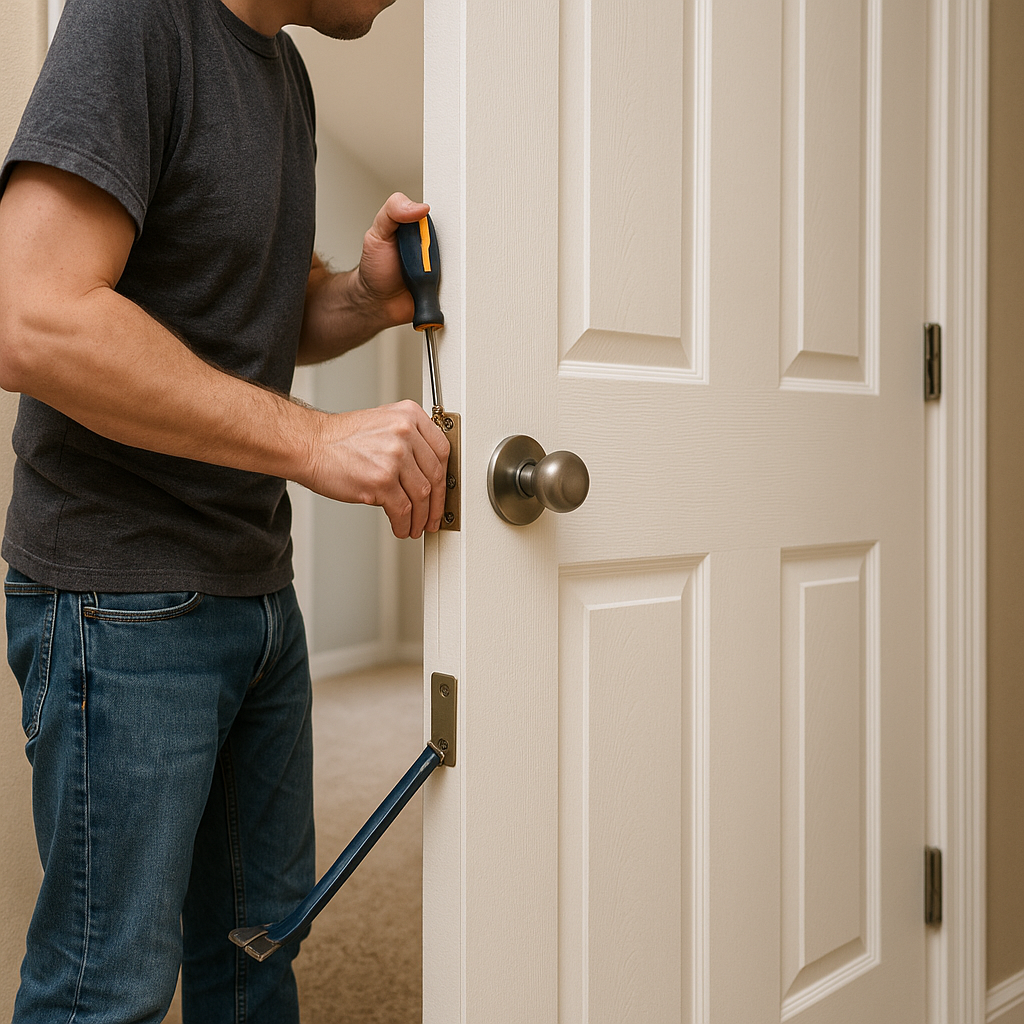
Step 2: How to Remove the Old Door
Removing your existing door is usually straightforward, but a bit of care will prevent damage to your walls and trim.
If you’re replacing just the slab, start by propping the door open with a wedge to support its weight. Then, remove the hinge pins by gently tapping them out from the bottom using a nail and hammer. I always recommend starting with the bottom hinge to prevent the door from suddenly dropping. Once the pins are out, lift the door off the hinges (grab a friend if it’s heavy) and set it aside—but keep it nearby as a template for your new door.
For a prehung replacement, you’ll remove both the door and frame. Carefully pry off the trim around the door using a putty knife and pry bar. If the trim is in good shape and you plan to reuse it, work slowly to avoid splits or cracks. After the trim is off, remove the old door and frame by taking out any fasteners securing the jamb to the wall studs. Once everything’s out, give the rough opening a good cleaning.
“I always tell my clients at K&B Direct to save the old door until the project is complete,” I often say. “It’s not just a template—it’s your backup plan if anything goes wrong!”
Step 3: Preparing the New Door for Installation
This step varies significantly depending on whether you’re installing a slab or prehung door.
With a slab door, your old door becomes invaluable as a template. Place it on top of your new door, making sure the bottom edges align perfectly, and clamp them together. Use a combination square and a sharp pencil to mark the hinge locations with precision.
If your new door needs trimming, less is more. For minor adjustments under 3/16″, a hand plane works beautifully. For larger cuts, a circular saw with a straightedge guide will do the trick, but always score your cutting lines with a utility knife first to prevent splintering. Oh, and be careful with that beveled edge on the strike side—that’s not the edge you want to trim!
For a prehung door, preparation is minimal. Simply check that the unit fits your rough opening (it should be about 1/2″ narrower and shorter to allow for adjustments) and remove any packaging materials or shipping braces.
Step 4: Installing the Hinges and Hardware
This is where craftsmanship really shines through. For a slab door, you’ll need to create mortises for the hinges and drill holes for the lockset.
Start by marking the hinge mortises using your combination square and measurements from the old door. Score the outline with a utility knife, then carefully chisel out each mortise. I always tell first-timers to start in the center and work outward, keeping the chisel bevel down for clean cuts. The hinges should sit perfectly flush with the door edge when you test-fit them.
Before installing the hinges, drill pilot holes to prevent the wood from splitting. Then secure the hinges with screws and use a door lock installation jig to drill holes for the lockset at the marked location. This jig is a lifesaver for getting perfectly aligned holes. Finally, install the latch mechanism according to the manufacturer’s instructions.
With a prehung door, the hinges are already installed, so you’ll just need to check that all screws are tight and install any additional hardware like doorknobs or locks.
Step 5: Hanging the New Door and Ensuring Proper Fit
This is the moment of truth—when all your careful preparation pays off.
For a slab door, position it in the opening, aligning the hinges with the mortises in the jamb. Insert the hinge pins from the top down, tapping them gently into place. Then test the door by opening and closing it several times. You’re looking for proper clearance—approximately 1/8″ at the top and sides, and 5/8″ at the bottom. If adjustments are needed, you can plane the edges or adjust the hinges. Once everything looks good, install the strike plate on the jamb, aligning it with the latch.
For a prehung door, center the unit in the rough opening and check that it’s level and plumb using a level on the jamb. Insert shims between the jamb and wall studs at hinge locations and the strike plate area, then secure the jamb to the studs with finishing nails or screws through the shims. Test the door operation to ensure it swings freely and latches properly, then install the trim around the door on both sides.
“Replacing an interior door is easier than you think. Learn how to do it yourself with this quick step-by-step guide.” This quote rings true for most of my customers who initially felt intimidated by the project but found satisfaction in completing it themselves.
At K&B Direct, we’ve seen hundreds of successful door installations by homeowners just like you. With patience and attention to detail, this project can transform your space in just a few hours. And remember, we’re always here to help with advice or the perfect door for your home.
Benefits of Solid Core Doors Over Hollow Core Doors
When you’re learning how to replace an interior door, the type of door you choose makes a huge difference in both the immediate experience and long-term satisfaction. The biggest decision most homeowners face is between solid core and hollow core doors—and it’s about much more than just price.
Hollow Core Doors
If you’ve ever accidentally punched a hole in an interior door (or watched a teenager do it during a moment of frustration), you’ve probably encountered a hollow core door. These lightweight options are constructed with a wooden frame and two thin facing panels, with a honeycomb cardboard structure inside providing minimal support.
Think of hollow core doors as the economy option. They’re budget-friendly (typically $30-$100) and wonderfully lightweight, making them easy to handle during your DIY installation. For closets, pantries, or rarely-used rooms, they can be perfectly adequate.
But here’s where they fall short: that morning alarm you hit snooze on? Everyone else in the house can hear it too. Your teenager’s music? Coming right through. These doors provide minimal sound insulation, and they’re also more vulnerable to damage. I’ve seen hollow core doors with dents from doorknobs, holes from impacts, and warping from bathroom moisture. With a typical lifespan of 20-30 years, they’re definitely the shorter-term option.
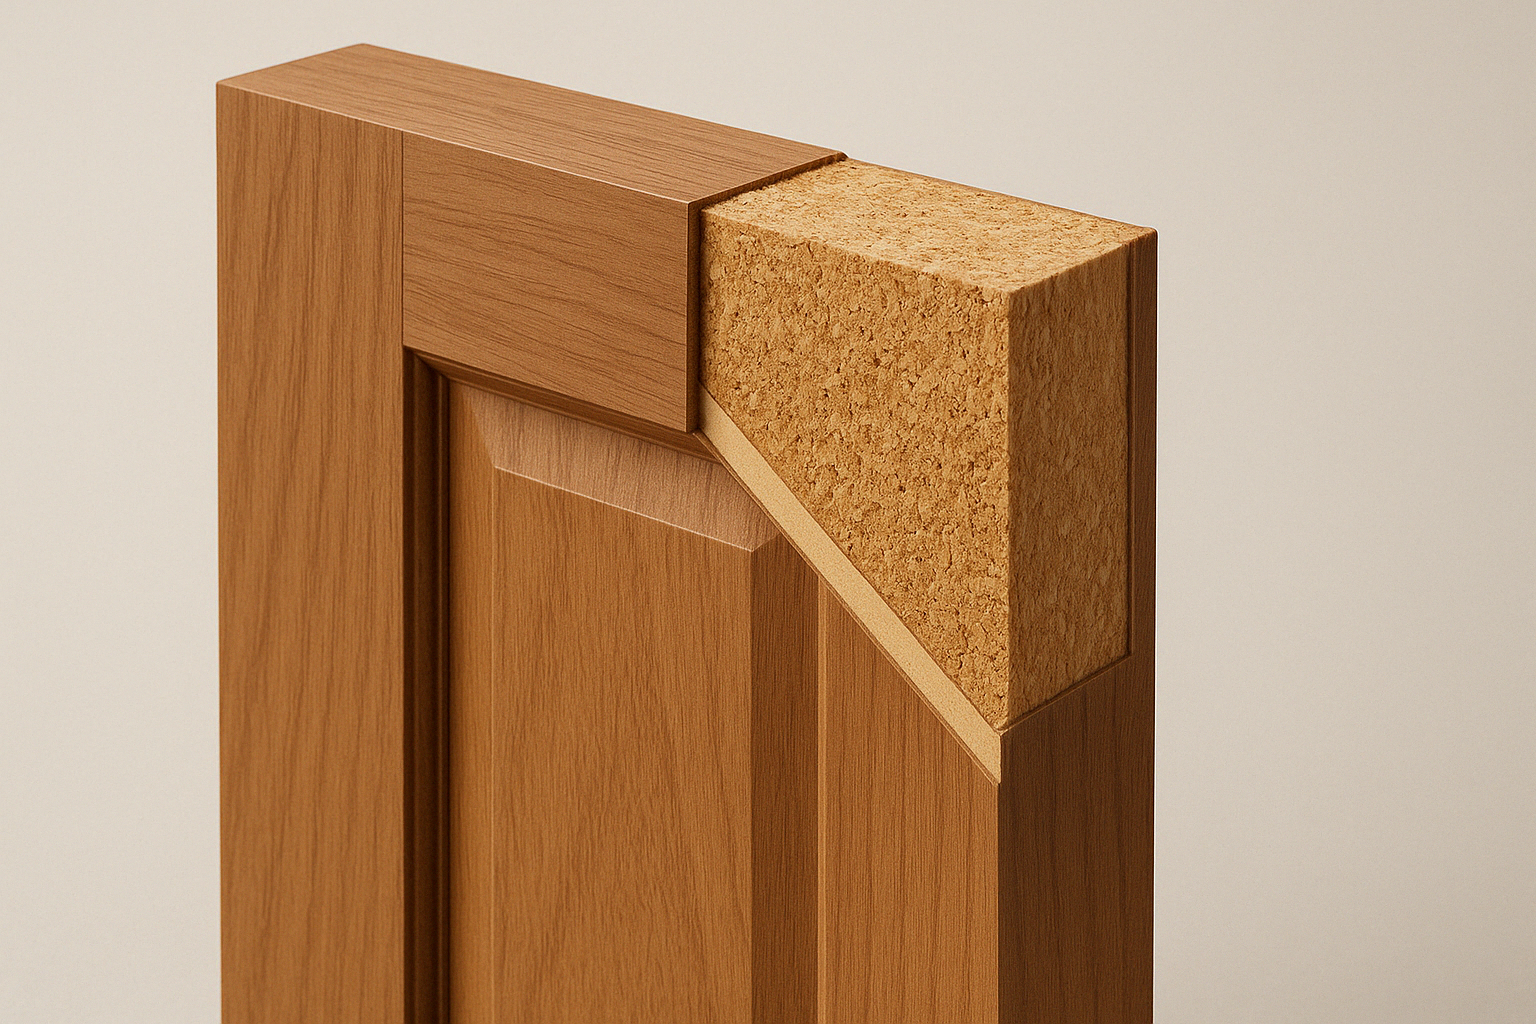
Solid Core Doors
Despite what the name suggests, solid core doors aren’t typically solid wood all the way through (those exist too, but at a much higher price point). Instead, most solid core doors use MDF (medium-density fiberboard) with a heavy composite or foam center that nearly doubles the weight compared to hollow doors.
The difference is immediately noticeable. Close a solid core door and you’ll hear that satisfying, substantial “thunk” that signals quality. Open and close it, and you’ll feel the weight and smoothness that speaks to craftsmanship. These doors feel more like furniture than construction materials.
The benefits go well beyond feel, though. Solid core doors reduce noise transfer by up to 50%, making them ideal for bedrooms, home offices, or bathrooms where privacy matters. They stand up to moisture better, resist damage from impacts, and typically last 30+ years with proper care. They even provide better insulation against temperature differences and improved fire resistance.
“I installed solid core doors in my home office, and it was the best decision I made during my renovation,” one of our customers told me recently. “I can take calls without disturbing my family, and my kids can be kids without worrying about interrupting my work.”
The downside? They’re heavier on both your wallet ($100-$500) and your muscles during installation. You’ll likely need a friend to help position the door, and sometimes stronger hinges to support the additional weight. But as we often tell customers at K&B Direct, this is one of those investments that pays dividends every single day you live in your home.
For bedrooms, bathrooms, and home offices, we almost always recommend solid core doors. The additional sound insulation alone makes the investment worthwhile for most families. After all, a door isn’t just something you pass through—it’s what creates privacy and comfort in your personal spaces.
Tips and Common Challenges in Door Replacement
Let’s face it – even with the best preparation, you might hit a few bumps when replacing an interior door. Don’t worry! I’ve seen these challenges countless times, and they’re all solvable with a little know-how.
Ensuring Proper Fit
Nothing’s more frustrating than installing your beautiful new door only to find it sticks or won’t close properly. If you’re dealing with uneven gaps or a door that won’t quite shut, first check that your door frame is square and plumb using a level.
Often, the solution is as simple as adding shims behind the hinges. These thin wooden wedges work wonders for adjusting the door’s position. I remember helping a customer who was ready to return her door because it wouldn’t close – a couple of strategic shims later, it swung perfectly!
“Always adjust the hinge side first as it supports the door’s weight,” advises an installation expert. “Once that side is properly aligned, the latch side usually falls into place.”
Dealing with Non-Standard Sizes
Older homes especially tend to have doorways that don’t match today’s standard sizes. When you measure and find your opening is non-standard, you have two main options: order a custom door (which will cost more) or buy a standard door that’s slightly larger and trim it down.
Most solid wood doors can be trimmed by up to 1/2″ on each side without issues. Solid core doors can usually handle some trimming too, but be more cautious with hollow core doors – cutting too much can expose the hollow interior. At K&B Direct, we help customers evaluate whether trimming or going custom makes more sense for their situation.
Hinge Alignment Problems
Hinges that don’t line up properly can make your door installation experience… interesting. The best approach is preventive – use your old door as a template when marking hinge positions on your new door.
If you’re still having alignment issues, you might need to fill the existing mortises with wood filler and create new ones, or adjust where you place the hinges on your new door. A little wood putty and patience can save you from a door that swings awkwardly.
Door Binding or Sticking
If your newly installed door rubs against the jamb, try this clever trick: rub a bit of lipstick or chalk on the edge of the door where you suspect it’s sticking. Close and open the door, and the color will transfer to the exact spot on the jamb where contact is happening. Then you can plane or sand just that specific area for perfect clearance.
I once saw a customer try to plane down their entire door edge when only a tiny spot was causing the problem. This targeted approach saved them a lot of unnecessary work!
Working Alone
How to replace an interior door when you’re flying solo? Handling a heavy door by yourself can be tricky, but there are ways to make it manageable.
Create a temporary support under the door using a stack of books or a small jack to hold it at the right height while you work on the hinges. This “third hand” approach has saved many a DIYer from door installation frustration. Of course, for heavier solid core doors, grabbing a friend for 15 minutes is still the easiest solution.
“Test the door operation gradually—quarter, half, and three-quarters open—to identify any alignment issues,” suggests a door installation professional. This methodical approach helps pinpoint exactly where adjustments are needed.
For more detailed guidance on common door installation challenges, check out Angi’s step-by-step guide to replacing interior doors, which offers additional professional tips for a successful project.
For particularly challenging installations, our team at K&B Direct is always ready to provide guidance. We’ve talked customers through tricky spots over the phone, and for our Chicago and Schiller Park neighbors, we can recommend trusted installation professionals when needed.
Almost every door installation challenge has a simple solution – and the satisfaction of successfully completing your project is absolutely worth the effort!
Choosing the Right Replacement Door for Your Home
When it comes to choosing a replacement door, the options can feel overwhelming. I’ve helped countless homeowners through this decision process, and I’ve found that balancing both practical needs and style preferences leads to the most satisfying results.
Door Materials
The material of your door affects everything from its durability to its appearance. Solid wood doors bring a timeless beauty to any space and can be either stained to showcase their natural grain or painted to match your color scheme. They feel substantial when you open and close them, though they may respond to humidity changes over time.
Engineered wood doors offer a wonderful middle ground. We recommend these to many of our customers because they combine real wood’s beauty with improved stability. The construction method, which uses wood fibers bonded with resins, helps prevent the warping that sometimes affects solid wood.
If you’re looking for a budget-friendly option that still looks great, MDF doors might be your answer. These doors provide a perfectly smooth surface that takes paint beautifully. While they may lack some of the character of natural wood, they make up for it in consistency and value.
For spaces where you want to maintain privacy while allowing light flow, glass panel doors create a lovely solution. I’ve seen these transform dark hallways and create visual connections between rooms without sacrificing separation. They’re particularly effective for home offices, dining rooms, or living areas.
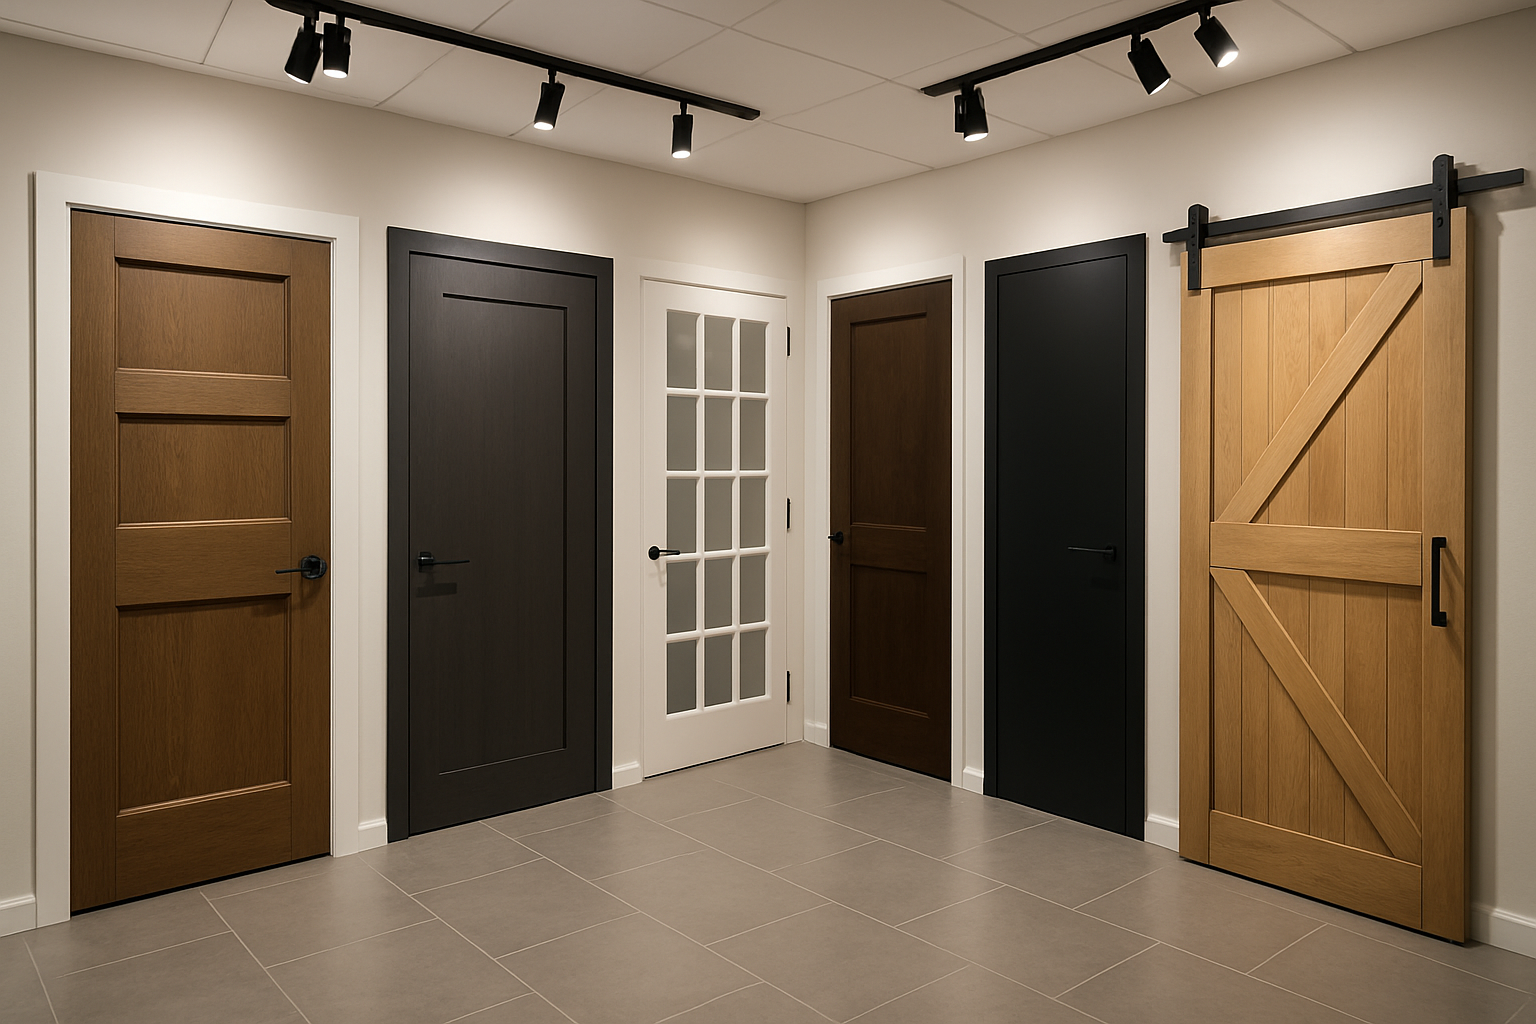
Door Styles
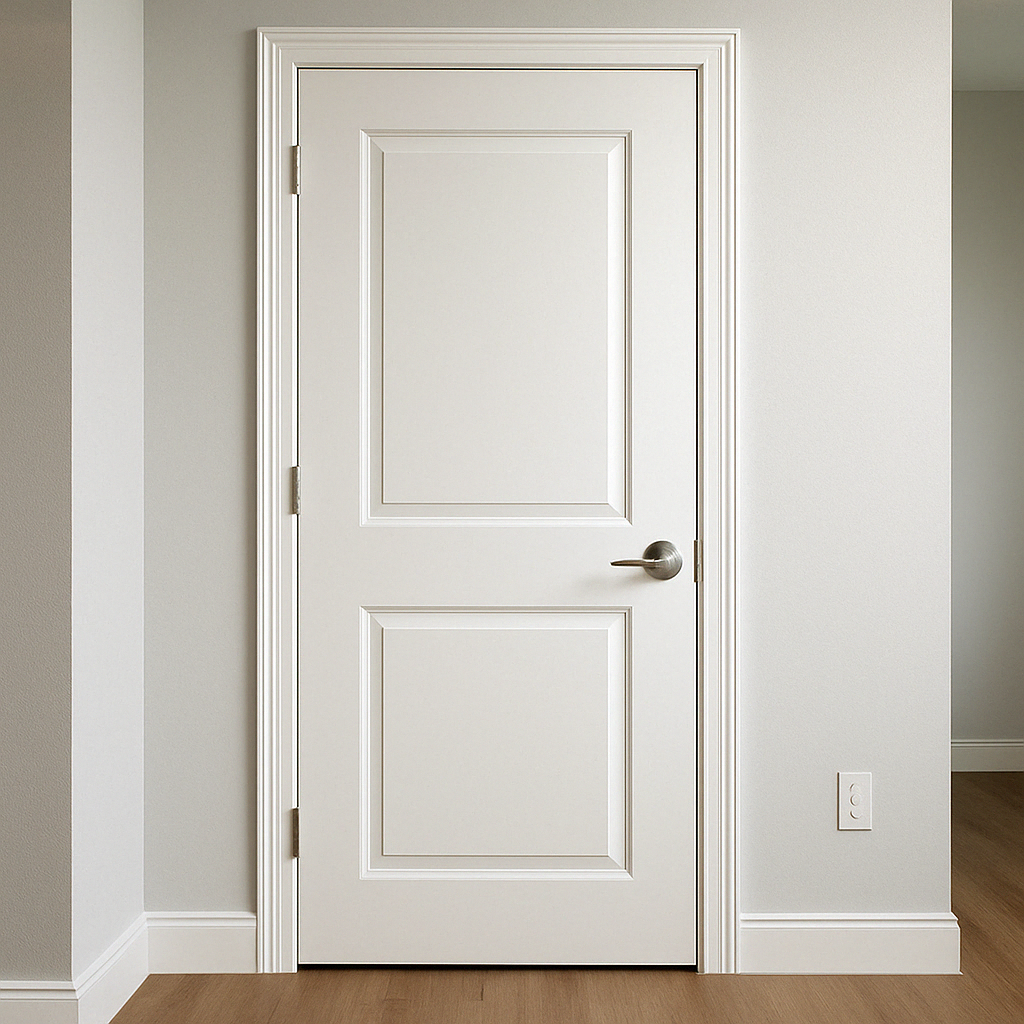
The style of your door can dramatically impact your home’s interior aesthetic. Panel doors remain the most popular choice among our customers at K&B Direct. These traditional doors feature raised or recessed panels in various configurations – from single-panel designs to six-panel colonial styles. They add architectural interest and work well in most homes.
If your taste leans more contemporary, flush doors offer clean, uninterrupted surfaces that complement modern decor beautifully. Their simplicity makes them incredibly versatile and timeless in their own way.
For creating neat transitions between spaces, French doors with their multiple glass panes bring a touch of sophistication while maintaining an open feel. I’ve installed these between living and dining areas with stunning results.
Though they require a different installation approach than what we’ve covered in how to replace an interior door, barn doors have surged in popularity for good reason. They save floor space, add rustic charm, and create a distinctive focal point in any room.
Matching Your Home’s Architecture
One piece of wisdom I share with every customer: your doors should feel like they belong in your home. This means considering your home’s architectural style and period.
“The notion that replacing original solid wood interior doors with MDF solid core doors can provide a comparable painted finish while potentially improving door functionality” is supported by many design professionals. This approach often makes sense when you’re updating older homes while honoring their character.
When helping customers select doors, I always consider three key factors:
First, period consistency matters. A Victorian home calls for different door styles than a mid-century ranch. Six-panel colonial doors complement traditional homes beautifully, while flush doors often look more at home in contemporary settings.
Second, consider your existing trim. Your new door will need to work harmoniously with your baseboards, crown molding, and window trim. Sometimes bringing a photo of your trim to our showroom helps us guide you toward complementary door styles.
Third, think about your overall design scheme. Are you aiming for traditional elegance, rustic warmth, or minimalist simplicity? Your doors should reinforce your design vision rather than fighting against it.
At K&B Direct, we’ve noticed our 3-Panel Shaker interior doors have become customer favorites in recent years. Their clean lines and balanced proportions work beautifully in both traditional and modern homes – making them a safe bet if you’re uncertain about which direction to go.
As one design expert puts it, “A simplistic door panel design with straight horizontal and vertical lines is seen as timeless and more cohesive with home architecture.” This principle has guided many of our most successful door installations.
Whether you’re replacing a single door or updating your entire home, we’re happy to help you steer these choices. The right door doesn’t just fill an opening – it improves your living experience every day.
Frequently Asked Questions about Replacing Interior Doors
Can I replace an interior door without replacing the frame?
Yes, you can definitely replace just the door while keeping your existing frame! This approach (called a “slab door replacement”) is perfect when your doorframe is still in good shape but the door itself has seen better days.
Think of it like keeping the picture frame but swapping out the photo. You’ll take down the old door, use it as a pattern for the new one, mark where all the hardware goes, and hang it right back in the same frame.
It’s a more budget-friendly route that causes less disruption to your home. The trade-off? You’ll need to be extra careful with measurements and probably spend more time preparing the door compared to a prehung option.
As one of our contractors likes to say, “Your old door is worth its weight in gold as a template. Those hinge positions and lockset locations would be tricky to figure out from scratch!”
Is it better to choose a solid core or hollow core door?
This really comes down to your specific needs and what you’re willing to spend. Think about how the door will be used before deciding.
Go with a solid core door when sound privacy matters most – like for bedrooms, bathrooms, or that home office where you take Zoom calls. They’re also worth the investment for high-traffic areas since they can take more abuse without showing wear. If you’ve ever felt the difference between closing a substantial door versus a lightweight one, you know that solid core doors just feel more… well, solid.
Hollow core doors make perfect sense for spaces where sound insulation isn’t a priority – closets, pantries, or low-traffic areas. They’re lighter (great if you have kids who might struggle with heavier doors) and easier on your wallet.
One of our customers put it perfectly: “I installed solid core doors for our bedrooms and bathroom, and the difference in sound reduction compared to our old hollow doors is night and day. Worth every penny for the privacy alone.”
How much does it cost to replace an interior door?
Let’s talk numbers – your budget for a door replacement project can vary quite a bit depending on what you choose:
The door itself is your biggest expense. A basic hollow core slab might run you as little as $30, while a fancy solid core door could set you back $500 or more. Prehung options (with the frame included) naturally cost more, starting around $100 and going up from there.
Don’t forget to factor in hardware! Doorknobs and locksets range from basic $20 options to designer versions pushing $200. If you need to buy tools, set aside another $50-$200 depending on what you already own.
For finishing touches, budget about $20-$50 for paint or stain, plus supplies.
If DIY isn’t your thing, professional installation typically adds $100-$300 to your project cost, depending on complexity.
Here at K&B Direct, we work hard to offer competitive pricing on quality doors while helping you steer these choices. We’ve found that most of our customers in Chicago and Schiller Park appreciate having options across different price points, with clear explanations of what they’re getting for their money.
While it might be tempting to go with the cheapest option, doors are something you interact with multiple times daily – investing in quality often pays off in the long run!
Conclusion
There’s something deeply satisfying about closing a door you’ve installed yourself. That solid click, the smooth swing—it’s the sound of a job well done. Now that you’ve followed our guide on how to replace an interior door, you can step back and admire the change you’ve created in your home.
As we head into 2025, these tips and techniques remain fully up to date for homeowners looking to refresh their interiors with modern, stylish, and functional doors.
Throughout this journey, we’ve walked through every step of the process together—from taking those first careful measurements to hanging your new door and testing its swing. It’s amazing how such a seemingly small change can dramatically impact both the function and feel of your living space.
The key to success lies in the details. Those careful measurements you took at the beginning? They made all the difference. The time you spent choosing between a slab and prehung door? That thoughtful decision suited your specific needs. And that moment when you used your old door as a template? That clever trick ensured everything lined up perfectly.
For many of our customers at K&B Direct, the decision to upgrade to solid core doors has been particularly rewarding. The way these doors muffle sound between rooms and feel substantial when closed adds a sense of quality that transforms the entire home experience. It’s those little daily moments—the quiet you enjoy during a work call when someone closes a door down the hall, or the solid feel of closing your bedroom door at night—that remind you why this project was worth your time.
We’ve seen hundreds of homeowners in Chicago and Schiller Park complete this project successfully, and the pride they feel afterward is unmistakable. Even if you encountered a few challenges along the way—perhaps a stubborn hinge or a door that needed some extra trimming—working through those obstacles has given you valuable skills and confidence for future home improvement projects.
At K&B Direct, we believe your home should be a place that truly reflects you—from the kitchen cabinets to the doorways that connect your spaces. That’s why we’re passionate about providing quality doors that combine beauty with durability. Whether you’re looking for sleek modern designs or classic paneled options, we’ve got you covered.
Ready to tackle another door in your home? Or perhaps you’re inspired to take on a different home improvement project? Explore our range of interior doors to find your next perfect match. Our showrooms in Schiller Park and Chicago are always open to you, with our team ready to answer questions and provide guidance based on your specific home needs.
A new door opens possibilities—both literally and figuratively. The project you’ve just completed hasn’t just improved your home’s functionality; it’s refreshed your space and created a more comfortable environment for you and your family. That’s something worth celebrating!