Wainscoting & Wall Paneling in Schiller Park
We supply wainscoting and wall paneling to Schiller Park homeowners and contractors who want a finished, textured wall treatment throughout their home. Every component we carry is in stock at our Schiller Park location. Whether you are paneling a dining room, a hallway, or a bathroom, we help you choose the right style and calculate what you need. As your local cabinet store, we know what works in the homes around here.
Choosing the Right Wainscoting Style for Your Schiller Park Home
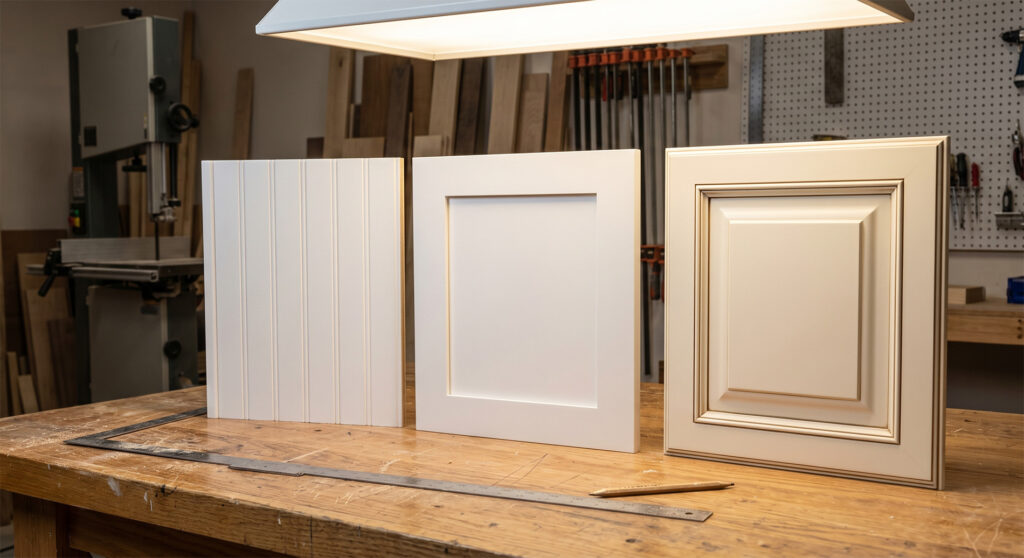
Wainscoting style is the first choice to get right. Raised panel looks formal and traditional. Flat panel reads cleaner and works in more contemporary interiors. Beadboard fits casual spaces and older homes. Most Schiller Park homes built mid-century work well with beadboard or flat panel, depending on how much detail the rest of the room already carries.
We carry beadboard sheets, flat panel MDF, and frame-and-panel components in standard sizes. Bring a photo of the room you are working on and we can point you toward the right system. Getting the style right before you start avoids a mismatched wall treatment that is difficult to reverse. We stock common sizes for same-day pickup.
How Wall Paneling Height and Pattern Affect a Room
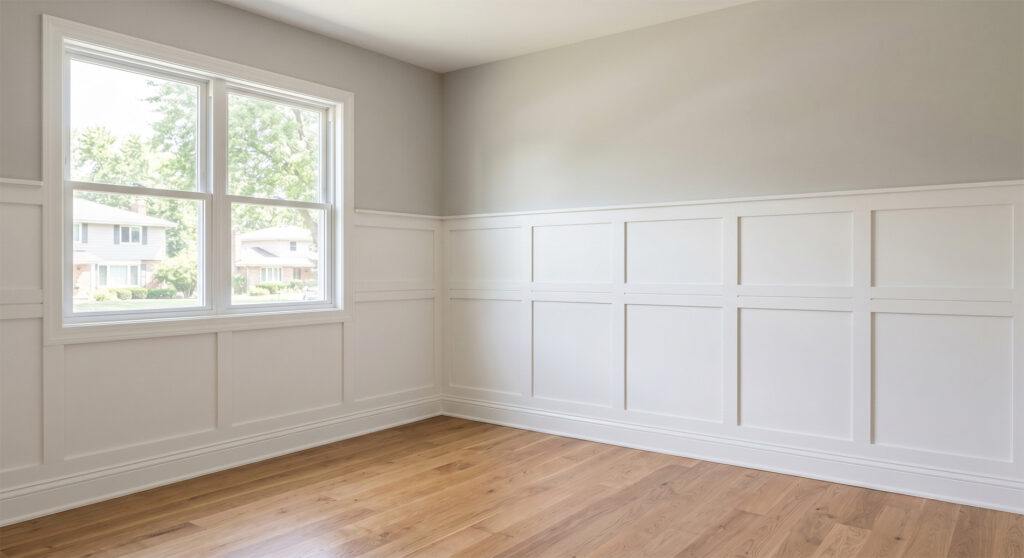
Wainscoting height and panel pattern change how a room reads from the moment you walk in. A treatment that runs to 36 inches draws the eye across the room horizontally and makes the space feel grounded. A taller panel zone at 42 to 48 inches adds formality and works well in rooms with higher ceilings or where you want more architectural presence.
Wider panels with bold frames read more traditional. Narrower beadboard grooves or slim flat panels read lighter and more casual. In a Schiller Park dining room with existing colonial trim, a raised or flat panel wainscoting at 36 inches ties the room together without competing with the ceiling line. We can show you how different panel widths look at the counter before you commit.
Wainscoting & Wall Paneling in Schiller Park — What to Know Before You Buy
Wainscoting and wall paneling add texture, depth, and a finished character to walls in living rooms, dining rooms, hallways, and bathrooms. In Schiller Park, most projects use beadboard or flat panel systems installed from the floor to a cap rail at 32 to 36 inches. The cap rail, panel material, and baseboard work together as a single wall treatment that should coordinate with the existing door casing in the room.
- Choosing the right panel style — beadboard, flat panel, or raised panel — for your room and trim style
- Calculating square footage and linear footage for panels, cap rail, and baseboard
- Selecting between paint-grade MDF and moisture-resistant options based on the room
Using Wainscoting in Dining Rooms and Hallways in Schiller Park
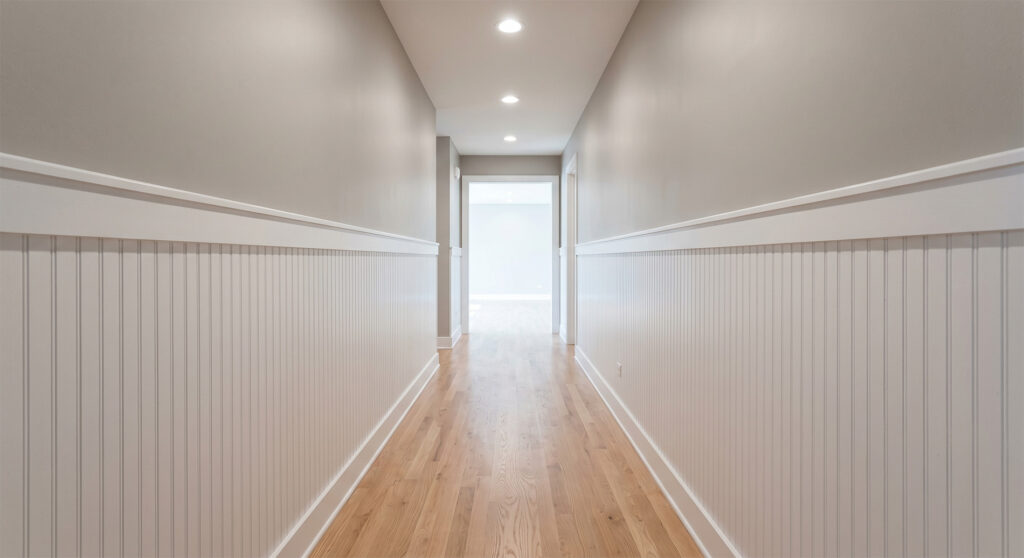
Dining rooms and hallways are the most common rooms where Schiller Park homeowners add wainscoting. In a dining room, a paneled lower wall at 36 inches gives the room a more finished and deliberate look without a full renovation. In a hallway, beadboard or flat panel wainscoting protects the wall surface from scuffs and chair backs while adding visual interest to a long, narrow space.
Many mid-century Schiller Park homes have plain drywall hallways with no trim detail. Adding a beadboard or flat panel wainscoting system with a cap rail and coordinating baseboard gives those walls a finished character that feels like it belonged there from the start. We stock the components to build that system from floor to cap in one visit.
MDF vs. Solid Wood Paneling — What to Use and Where
MDF is the most common material for painted wainscoting and wall paneling in interior rooms. It machines cleanly, takes primer and paint evenly, and holds a consistent finish across large surfaces. Beadboard sheets in MDF are the standard choice for most Schiller Park hallway and dining room projects where the paneling will be painted white or a wall color.
For bathrooms and laundry rooms, moisture-resistant options perform better over time. PVC beadboard does not swell or delaminate near water and installs the same way as MDF. Solid wood paneling is the right call when the wall treatment will be stained or when you are working in a space that needs to match existing wood trim. We carry all three so you can choose based on room conditions and finish plan.
How to Measure and Buy the Right Amount of Wainscoting
Measuring for wainscoting requires two numbers: the total linear footage of the walls you are covering and the height of the panel zone. Multiply those to get your square footage for sheet goods or panel fills. Then measure the same wall length again for cap rail and baseboard linear footage. Add 10 percent to each figure for waste and write each room separately so we can pull the right quantities.
If you are not sure which system to use, come in with your room measurements and a photo of the space and we will walk you through the options at the counter. We keep samples of beadboard, flat panel, and frame components in-store so you can compare them side by side. Most customers leave with material the same day. No appointment needed.
Preparing Walls Before Installing Wainscoting or Paneling
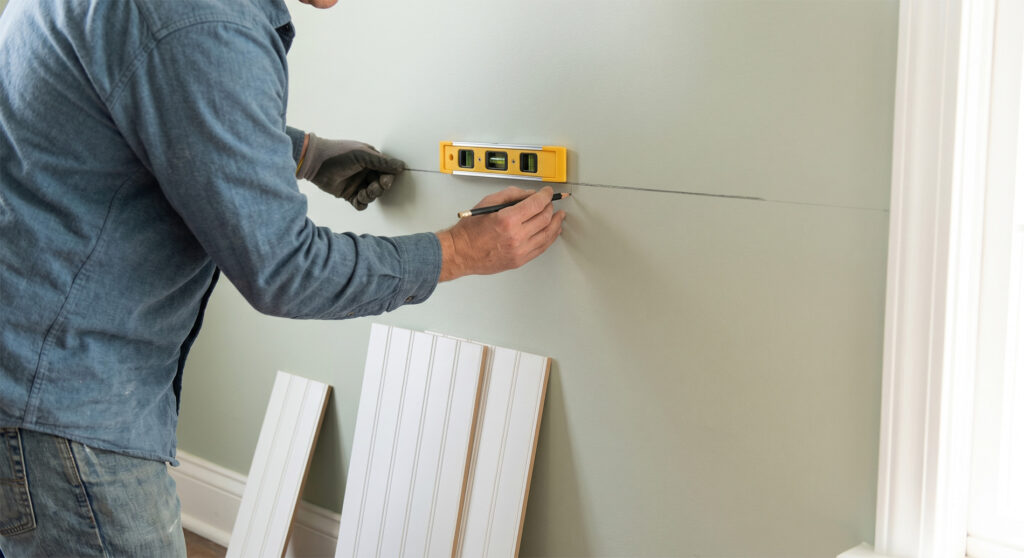
Flat, clean walls make wainscoting installation faster and look better when finished. Remove any existing baseboard in the panel zone before you start. Fill nail holes and skim-coat any uneven areas at the base of the wall. If the wall has significant bow or irregularity, address it first — paneling will follow the wall surface and gaps will show at the edges of each panel.
Locate and mark any electrical outlets in the wainscoting zone before you cut panels. Outlets will need to be extended to sit flush with the new panel surface — a licensed electrician can handle that if needed. Paint the wall above the wainscoting line before the panels go up. It is much easier to cut a clean paint line at the cap rail height on bare wall than to cut around installed trim after the fact.
Frequently Asked Questions (FAQ)
Buying wainscoting and wall paneling in Schiller Park comes with specific questions. We have gathered the most common ones from homeowners and contractors who visit our store. If your question is not listed here, call us at (224) 781-2925 or stop in at 3977 25th Ave, Schiller Park, IL 60176.
1. What is the standard height for wainscoting in a Schiller Park home?
2. Does wainscoting work in a bathroom?
3. Does installing wainscoting require a permit in Schiller Park?
4. What is the difference between raised panel and flat panel wainscoting?
5. Should the wainscoting cap rail match the baseboard?
6. Can I install wainscoting over existing paint or wallpaper?