
Change an Interior Door Without Unneeded Wall Work
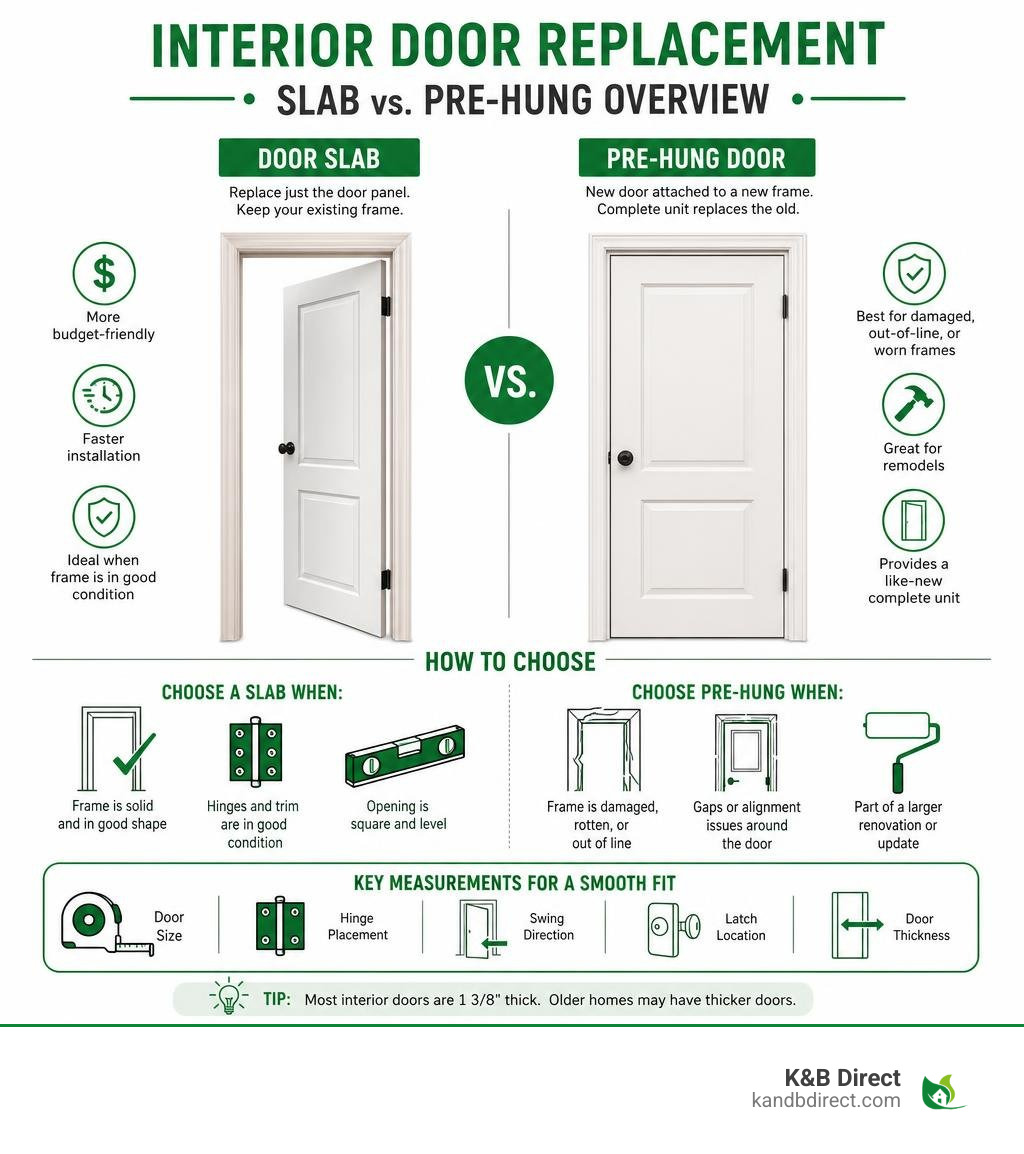
To change interior door panels, choose a replacement slab when the existing jamb, hinges, and trim are in good condition; choose a pre-hung unit when the jamb is damaged, badly out of line, or part of a larger remodel.
- A door slab replaces only the moving door panel and keeps the existing frame.
- A pre-hung door includes a new door already attached to a new jamb.
- Accurate measurements for size, hinge placement, swing direction, and latch location make the project fit smoothly.
- Most interior doors are 1 3/8 inches thick, but older homes may use thicker doors.
A new interior door can improve privacy, reduce noise with a solid-core option, and give a room a more finished look. The key is matching the replacement method to the condition of your current frame.
I’m Eryk Piatkowski, Owner at K&B Direct, where we have helped homeowners and professionals select quality home products since 2011. My experience helping clients plan functional, attractive spaces informs this guide to change interior door styles with greater confidence.
Pre-Hung vs. Slab: Choosing Your Door Replacement Method
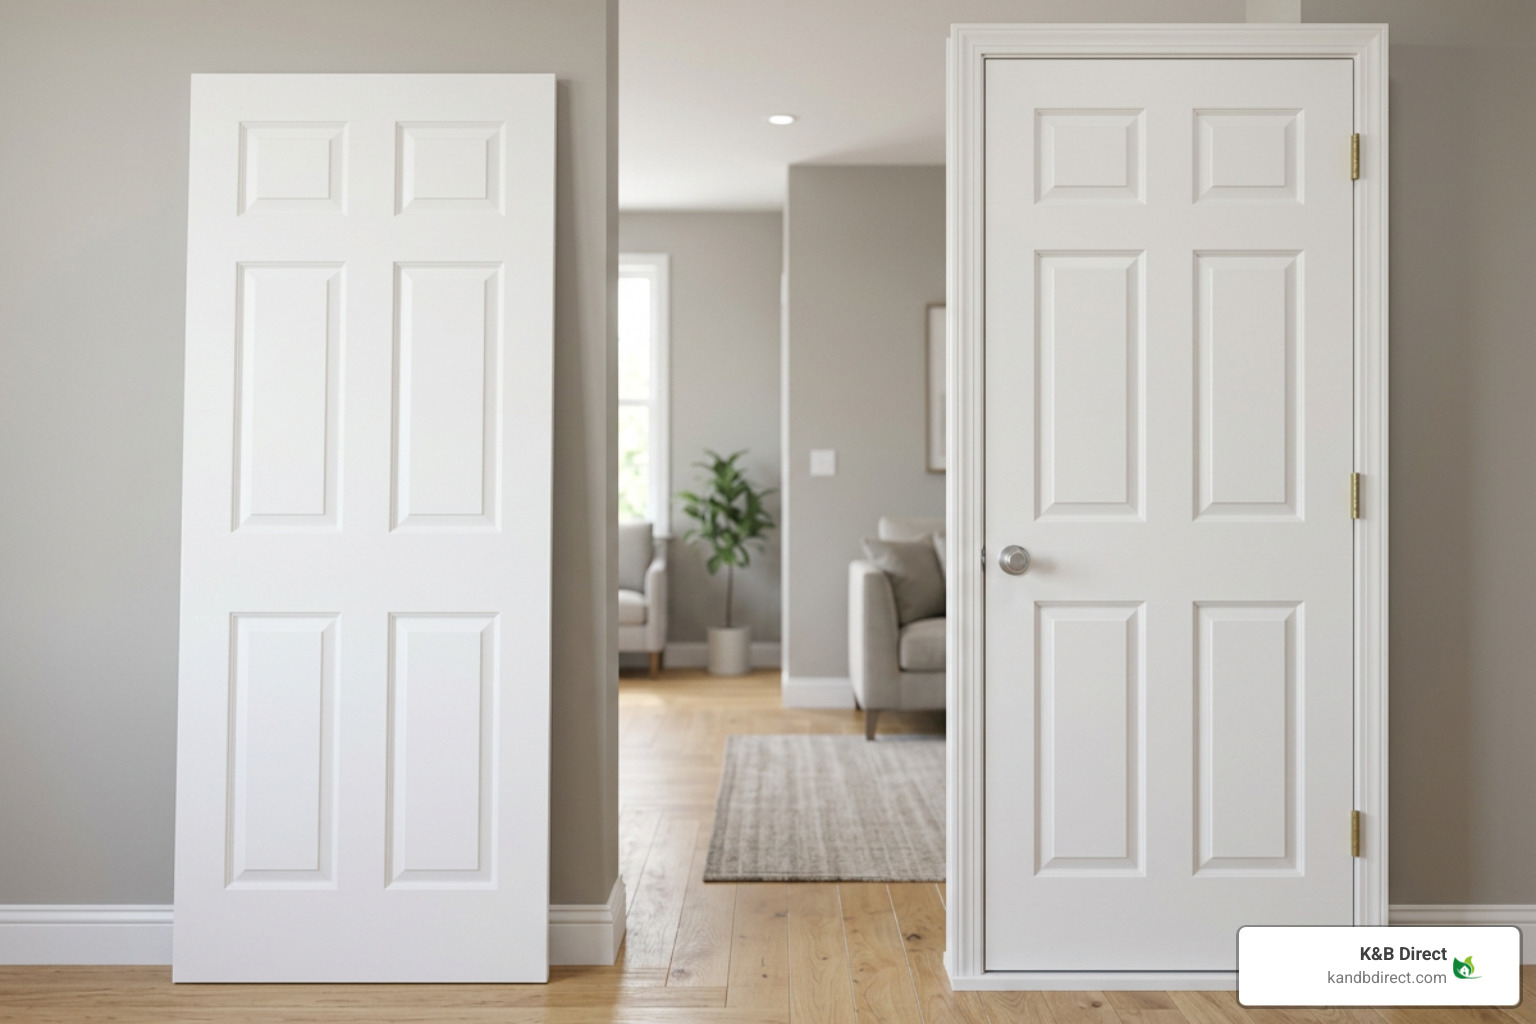
When planning to change interior door components across your living spaces, deciding between a slab replacement and a full pre-hung assembly represents your primary structural choice. Each approach serves distinct project requirements depending on your existing jamb condition and home architecture.
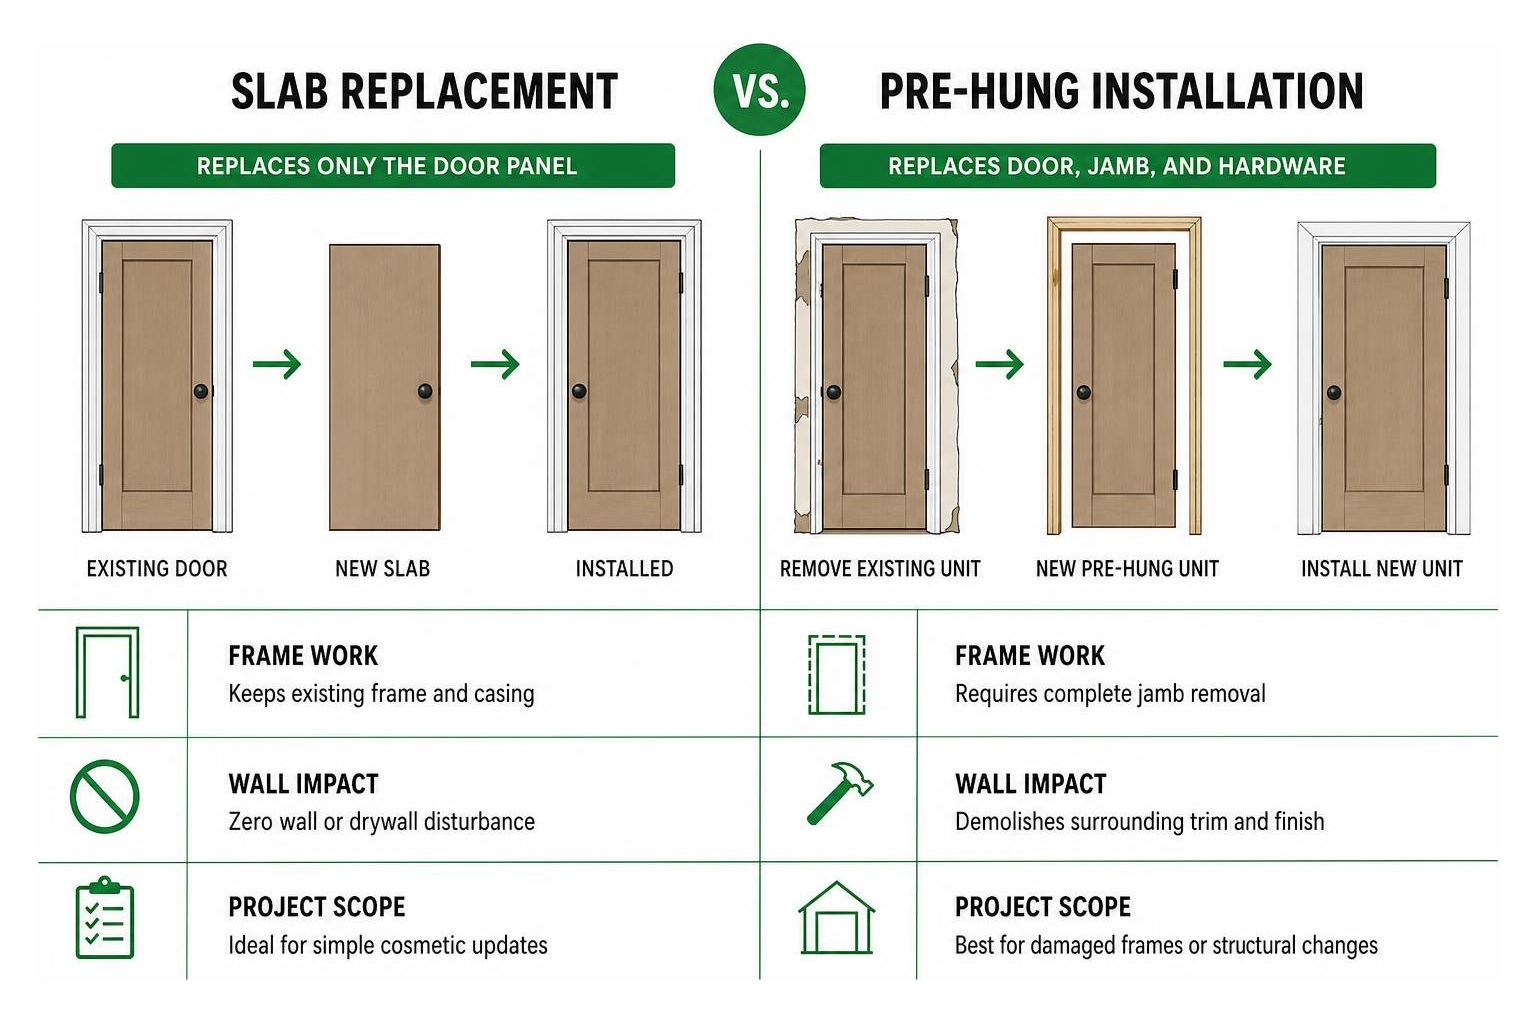
| Factor | Door Slab Replacement | Pre-Hung Door Assembly |
|---|---|---|
| Frame Work | Keeps existing frame and casing | Requires complete jamb removal |
| Wall Impact | Zero wall or drywall disturbance | Demolishes surrounding trim and finish |
| Project Scope | Ideal for simple cosmetic updates | Best for damaged frames or structural changes |
| Hardware Cutting | Requires manual routing and boring | Pre-routed and mortised at factory |
| Alignment | Fitted to existing opening shape | Adjusted with shims inside raw opening |
Replacing Just the Door Slab
Selecting a door slab replacement means ordering a plain blank or pre-cut panel without attached framing. We recommend this option when your current door jamb remains plumb, aligned, and structurally sound. Preserving the existing frame saves significant labor because you avoid tearing off decorative wall casing or disturbing surrounding drywall paint.
Swapping only the slab offers an effective route to upgrade hollow doors to dense solid core panels for soundproofing between bedrooms and quiet spaces. Standard interior slabs feature about 1 3/8 inches of solid wood framing along the top and bottom margins, allowing precision trimming to fit custom openings. For more details on choosing frame options, explore our guide on Pre-Hung Doors.
Replacing the Entire Pre-Hung Assembly
A pre-hung unit consists of a complete package with the door panel pre-hung on new jambs using factory-installed hinges. You should opt for a pre-hung assembly when current frames suffer from deep rot, splitting wood, or severe sagging out of alignment.
Installing a pre-hung unit requires pulling off the old casing trim, removing the existing jamb, and shimming the new unit into the rough wall opening. While this adds extra wall finishing work, it gives you a fresh frame where every seam lines up perfectly. Review our Interior Door Unit Complete Guide to evaluate full assembly features for your project.
Planning and Preparing to Change Interior Door Slabs
Proper planning prevents installation headaches. Taking accurate measurements guarantees your replacement panel glides smoothly within the opening without sticking or binding against carpet.

Essential Tools Needed to Change Interior Door Slabs
Gathering high-quality carpentry tools simplifies modifying blank panels. Here is what we recommend having on hand before beginning your project:
- Circular saw with a fine-finish blade
- Plunge router equipped with a hinge guide template
- 2 1/8 inch hole saw for lockset boring
- 7/8 inch spade bit for the edge latch hole
- Wood chisel set and mallet
- Combination ruler and tape measure
- Utility knife for clean line scoring
- Safety goggles and ear protection
- Power drill with self-centering pilot bits
Having these items ready ensures smooth progress from removal to final hardware mounting. Read our detailed guide on Guide to Replacing an Interior Door for deep technical tips.
Measuring Hardware Backset and Clearance Gaps
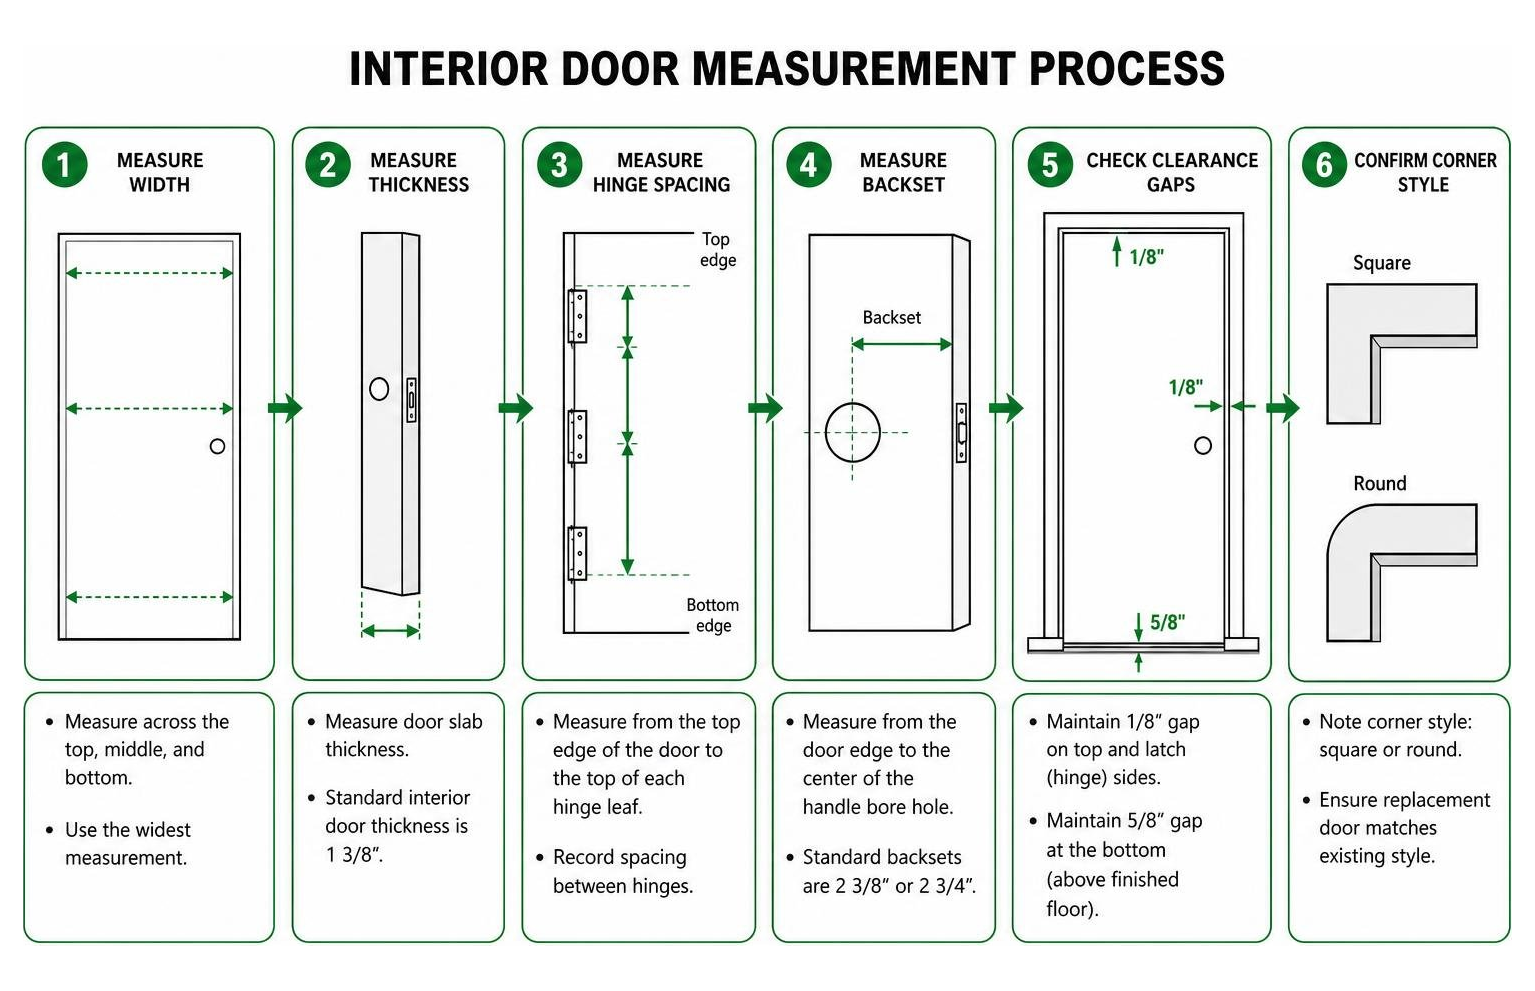
Precision measurement keeps your new installation functioning properly. Measure width across the top, middle, and bottom of your current panel, using the widest measurement if minor variations exist. Standard residential interior doors measure 1 3/8 inches thick, whereas specialty or older historic units can reach 2 to 2 1/4 inches.
Determine hinge spacing by measuring from the top edge of the panel down to the top of each hinge leaf. Record the hinge height—typically 3 inches, 3 1/2 inches, or 4 inches—and note corner style, whether right-angle or rounded radiuses.
Measure hardware backset from the door edge to the center of the handle bore hole. Standard interior backsets measure either 2 3/8 inches or 2 3/4 inches. Maintain standard perimeter clearance gaps during setup: 1/8 inch along top and latch sides, and 5/8 inch above finished floor surfaces for smooth airflow and clearance over carpets.
Step-by-Step Guide to Removing, Trimming, and Mortising
Executing clean cuts and mortises allows a basic slab blank to operate smoothly inside an existing frame.
- Remove hinge pins starting from the bottom leaf and moving upward while a helper holds the panel steady.
- Detach old handles, latches, and hinge plates from the removed door.
- Lay the old panel directly over your new slab blank, aligning them carefully at the top edge and handle bore hole.
- Trace the exact perimeter profile of the old door onto the new slab using a sharp pencil.
- Score along the marked cut lines using a utility knife to slice top veneer fibers and prevent wood splintering.
- Trim excess length using a circular saw guided by a clamped straightedge.
- If cutting a hollow panel removes the solid bottom support piece, reclaim the wood plug from the cut scrap piece and glue it back into the hollow bottom cavity.
- Transfer hinge locations accurately from the original door using a combination ruler.
- Attach a router hinge jig and carve mortises to equal the exact thickness of your hinge plates.
Before routing or drilling, review OSHA hand and power tool guidance and wear proper eye and hearing protection.
Step-by-Step Instructions to Change Interior Door Hardware
Installing latch mechanisms correctly prevents binding when shutting the door. Align your hole template using the original backset center measurement.
Position your 2 1/8 inch hole saw on the face of the door. Bore halfway through the panel from one side, then stop and complete the hole from the opposite side. This double-sided technique prevents the hole saw from tearing away delicate surface veneers as it exits.
Next, drill the 7/8 inch latch edge hole from the door margin into the center bore cavity. Chisel out a shallow mortise for the latch faceplate so it sits flush with the wood edge. Pre-drill pilot holes for hardware screws using self-centering bits to avoid splitting the outer stile framing.
Hanging, Testing, and Adjusting the Door Fit
Lift the new panel into place and align the top hinge leaf attached to the door with the existing jamb leaf. Insert the top pin first to hold the weight, then align lower hinges and tap remaining pins home.
Swing the door through its full arc to evaluate reveal gaps. If the door rubs against the jamb near hinges, check whether mortises were chiseled too deep. Insert thin cardboard shims behind the leaf to lift it flush. Sand down tight edges along the latch side if minor jamb variations create snug spots.
Adjust the strike plate on the door jamb so the latch bolt seats snugly without rattling when closed.
Finishing Options, Project Expenses, and Professional vs. Personal Installation
Applying protective finishes preserves panel integrity and enhances interior decor.
Painting or staining doors while unhung on sawhorses produces clean, drip-free surfaces. Apply a durable semi-gloss interior paint finish that resists hand oil and wipes clean easily. Review our guide on Painting an Interior Door for finishing techniques.
Expense Breakdown and Materials
Planning project materials helps maintain a manageable budget when updating multiple rooms across your residence.
- Hollow-core slab panels generally range between $50 and $75 each, serving as budget-friendly options for closets and secondary spaces.
- Heavy solid-core panels typically range from $100 to $800 depending on wood species, panel design, and sizing.
- Modern hardware sets, quality hinges, and specialized routing tools add modest material expenses to complete the job.
Upgrading multiple rooms simultaneously reduces total tool investment per opening while giving your entire interior design a cohesive look. Learn more about material choices in our Interior Door Selection Guide 2025.
Personal vs. Professional Installation
Changing door slabs personally offers clear financial savings and flexible scheduling over a single weekend. Most homeowners can trim, mortise, and hang a replacement panel using basic power tools and careful measurements.
However, if your surrounding door jambs show structural damage or require complete frame realignment, seeking professional assembly help guarantees solid operational results without risking damaged wall finishes.
Frequently Asked Questions About Changing Interior Doors
Can I replace an interior door slab without replacing the frame?
Yes. Replacing only the slab while retaining existing frames and trim works exceptionally reliably whenever current jambs remain plumb and aligned. This preserves original wall casings and saves significant installation time.
Should I paint or stain my new door before or after installation?
We recommend finishing the door before final installation. Painting or staining while the panel rests horizontally on sawhorses prevents runs and ensures smooth coverage across top and bottom margins. Perform initial test fittings first to complete trimming or sanding before applying final paint coats.
Guide to Fixing a New Door That Sticks or Has Uneven Gaps
Fix sticking issues by identifying contact points along the frame. Sand down minor high spots on the latch edge, or shim behind hinge plates if the panel sits unevenly inside the opening. Ensure perimeter gaps maintain 1/8 inch clearance across top and side margins.
Conclusion
Updating interior doors enhances acoustic privacy, restores smooth operation, and delivers modern visual charm to your living environment. By carefully choosing between door slab replacement and pre-hung assemblies, measuring hardware dimensions accurately, and following structured trimming steps, you can transform your home with confidence.
At K&B Direct, we supply premium interior doors, cabinets, and moulding across Chicagoland locations including Schiller Park, Chicago, Rosemont, Park Ridge, Franklin Park, Des Plaines, and surrounding communities. We are dedicated to providing top-quality building products at unbeatable prices alongside helpful customer service to bring your renovation vision to life. Explore High-Quality Interior Doors at K&B Direct to find the ideal styles for your upcoming project.