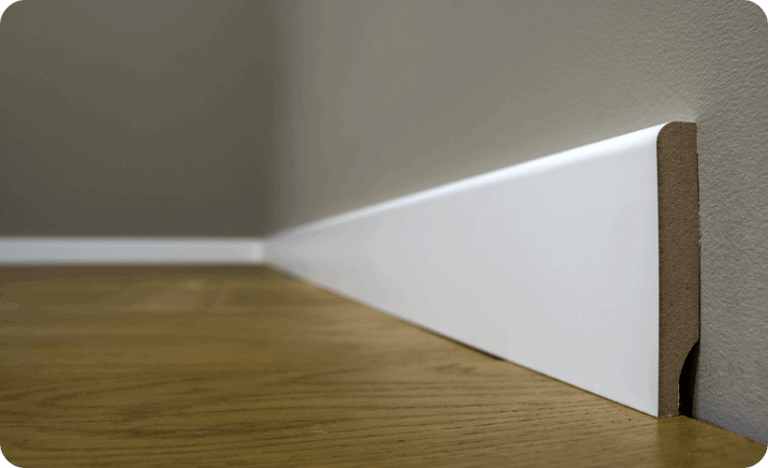
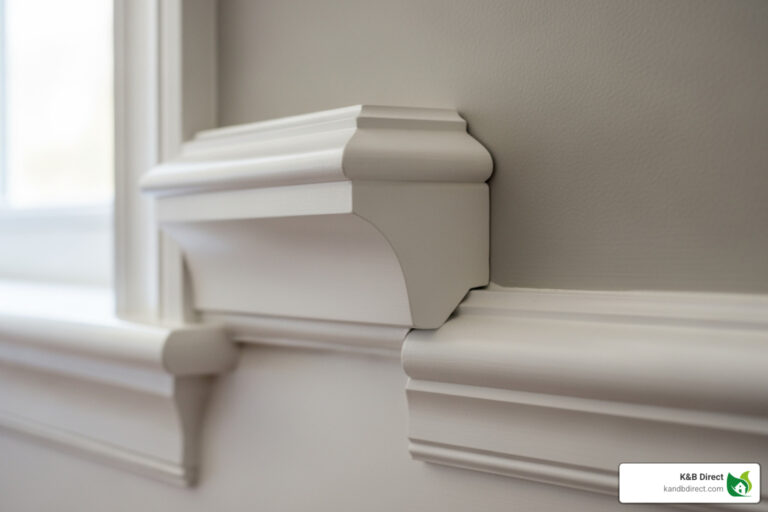
Installing Baseboards and Quarter Round in the Right Order
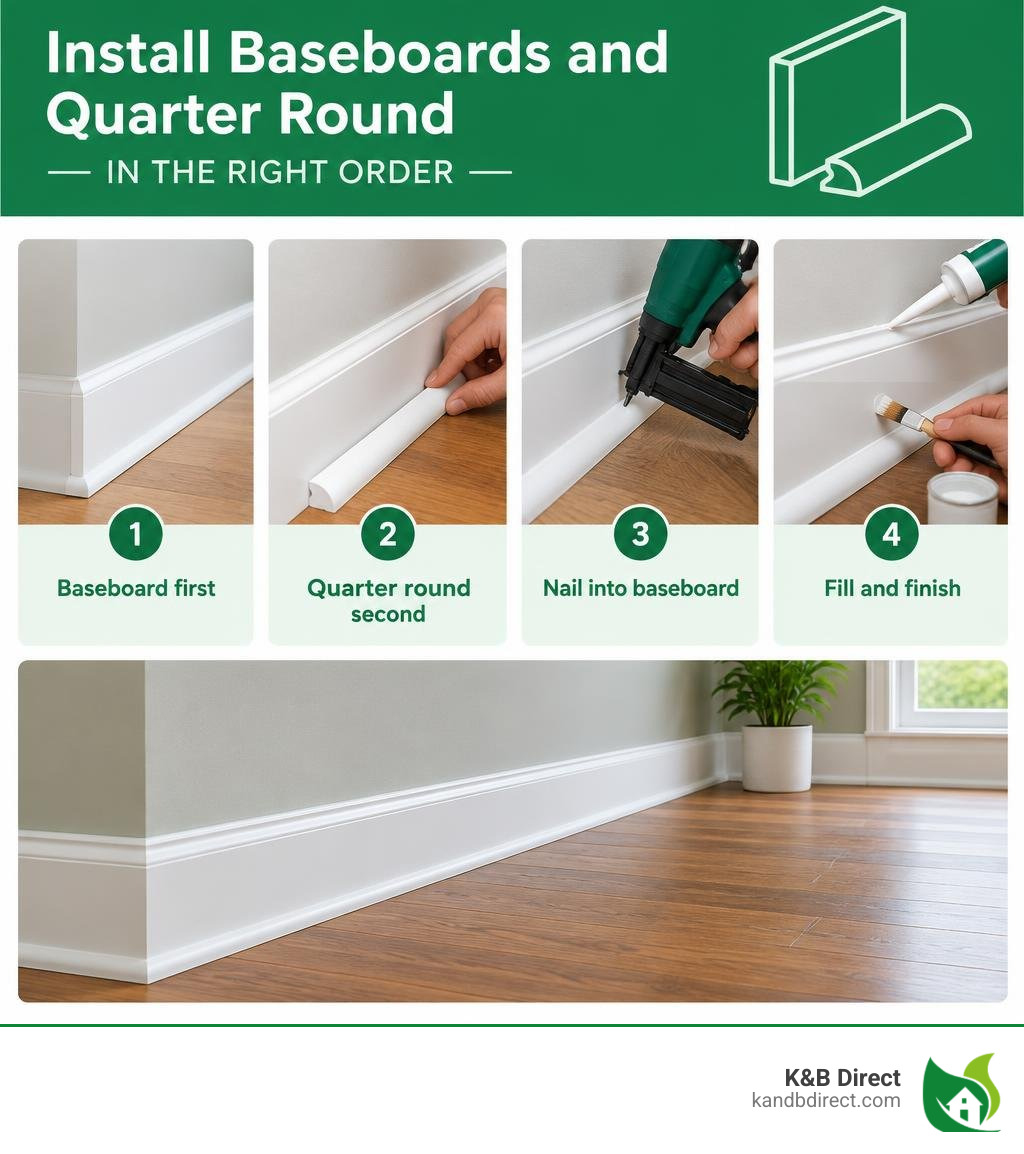
For installing baseboards and quarter round, fit and fasten the baseboards first. Then fit the quarter round against the floor and nail it into the baseboard, not the flooring, so the floor can move. Fill nail holes, caulk seams against the wall, and touch up the paint. If the baseboard already covers the floor gap, you may not need quarter round; slimmer shoe moulding is another option.
I’m Eryk Piatkowski, owner of K&B Direct, where I’ve worked with homeowners on renovation products since 2011. I bring that product guidance to installing baseboards and quarter round, starting with the choices that make the trim look neat and leave the floor room to move.
Learn more about installing baseboards and quarter round:
Essential Tools and Materials for Installing Baseboards and Quarter Round
Achieving crisp, tight joints requires gathering the proper equipment before making a single cut. Having dedicated finish carpentry tools ensures clean cuts and prevents damage to surrounding finishes.
- Miter Saw: A 10-inch or 12-inch compound miter saw equipped with a fine-finish blade (at least 60 to 80 teeth) for mirror-smooth end cuts.
- Pneumatic or Cordless Nail Guns: A 15-gauge or 16-gauge finish nailer for thick baseboards, and an 18-gauge brad nailer for delicate quarter round. For outside corners and tiny return pieces, a 23-gauge micro-pin nailer prevents split wood.
- Fasteners: 2-inch to 2-1/2-inch finish nails for baseboard fastening into wall studs, and 1-1/4-inch to 1-1/2-inch 18-gauge brad nails for quarter round.
- Hand Tools: Coping saw with flexible high-carbon blades, tape measure, combination ruler, stud finder, hammer, pneumatic nail punch or nail set, and sharp utility knife.
- Prep and Finishing Supplies: Quality wood glue (PVA), exterior/interior spackle or wood filler, paintable elastomeric acrylic latex caulk, 150-grit to 220-grit sandpaper, and a handheld moisture meter.
| Feature | Standard Quarter Round | Base Shoe Moulding |
|---|---|---|
| Typical Dimensions | 3/4 inch by 3/4 inch | 1/2 inch wide by 3/4 inch tall |
| Cross-Section Profile | True quarter-circle | Slender vertical oval/cove |
| Lateral Flexibility | Moderate | High (easily tracks floor dips) |
| Perimeter Coverage | Up to 3/4 inch expansion gap | Up to 1/2 inch expansion gap |
| Best Architectural Match | Chunky trim, large rooms | Sleek profiles, narrow door casing reveals |
Selecting quality millwork such as a general purpose quarter round base shoe provides a clean foundation that takes paint evenly across every run.
Choosing Between Quarter Round and Shoe Moulding
Quarter round and shoe moulding both bridge the expansion void between your wall and flooring, yet they create different visual proportions. Standard quarter round measures a symmetrical 3/4-inch by 3/4-inch. Its broader footprint makes it ideal for covering wide perimeter margins required by floating laminate, engineered plank, or solid hardwood floors.
In contrast, shoe moulding is narrower—typically 1/2-inch deep by 3/4-inch tall. Because it extends less into the living area, shoe moulding preserves valuable margins at door casing transitions where a thicker profile might protrude past the plinth or architrave. For tight dips in uneven subfloors, shoe moulding bends more readily to hug low spots without snapping. Choosing the right profile makes hiding flooring expansion gaps look intentional rather than added as an afterthought.
Acclimation and Pre-Finishing Preparation
Solid wood and composite trim expand or shrink in response to relative humidity. Wood moulding straight from a supplier often holds a moisture content between 12% and 14%, whereas indoor living environments in communities around Schiller Park, Des Plaines, and Schaumburg balance closer to 6% to 10% moisture content.
Bring trim into the conditioned space roughly five to seven days before installation. Stack boards flat on spacers to permit airflow around all surfaces.
Pre-painting your trim saves countless hours on your knees and prevents paint from accidentally bleeding onto pristine hardwood or luxury vinyl planks:
- Inspect boards and lightly sand rough spots with 180-grit abrasive paper.
- Apply an even coat of stain-blocking primer to bare wood, or wipe factory-primed pieces clean.
- Roll on one coat of high-grade acrylic enamel trim paint using a high-density mini foam roller to eliminate brush marks.
- Allow pieces to dry completely before measuring and cutting. You only need a minor brush touch-up over filled nail holes once everything is secured.
Step-by-Step Baseboard Installation Process
Starting baseboard work with systematic room layout prevents awkward joint locations and uneven heights.
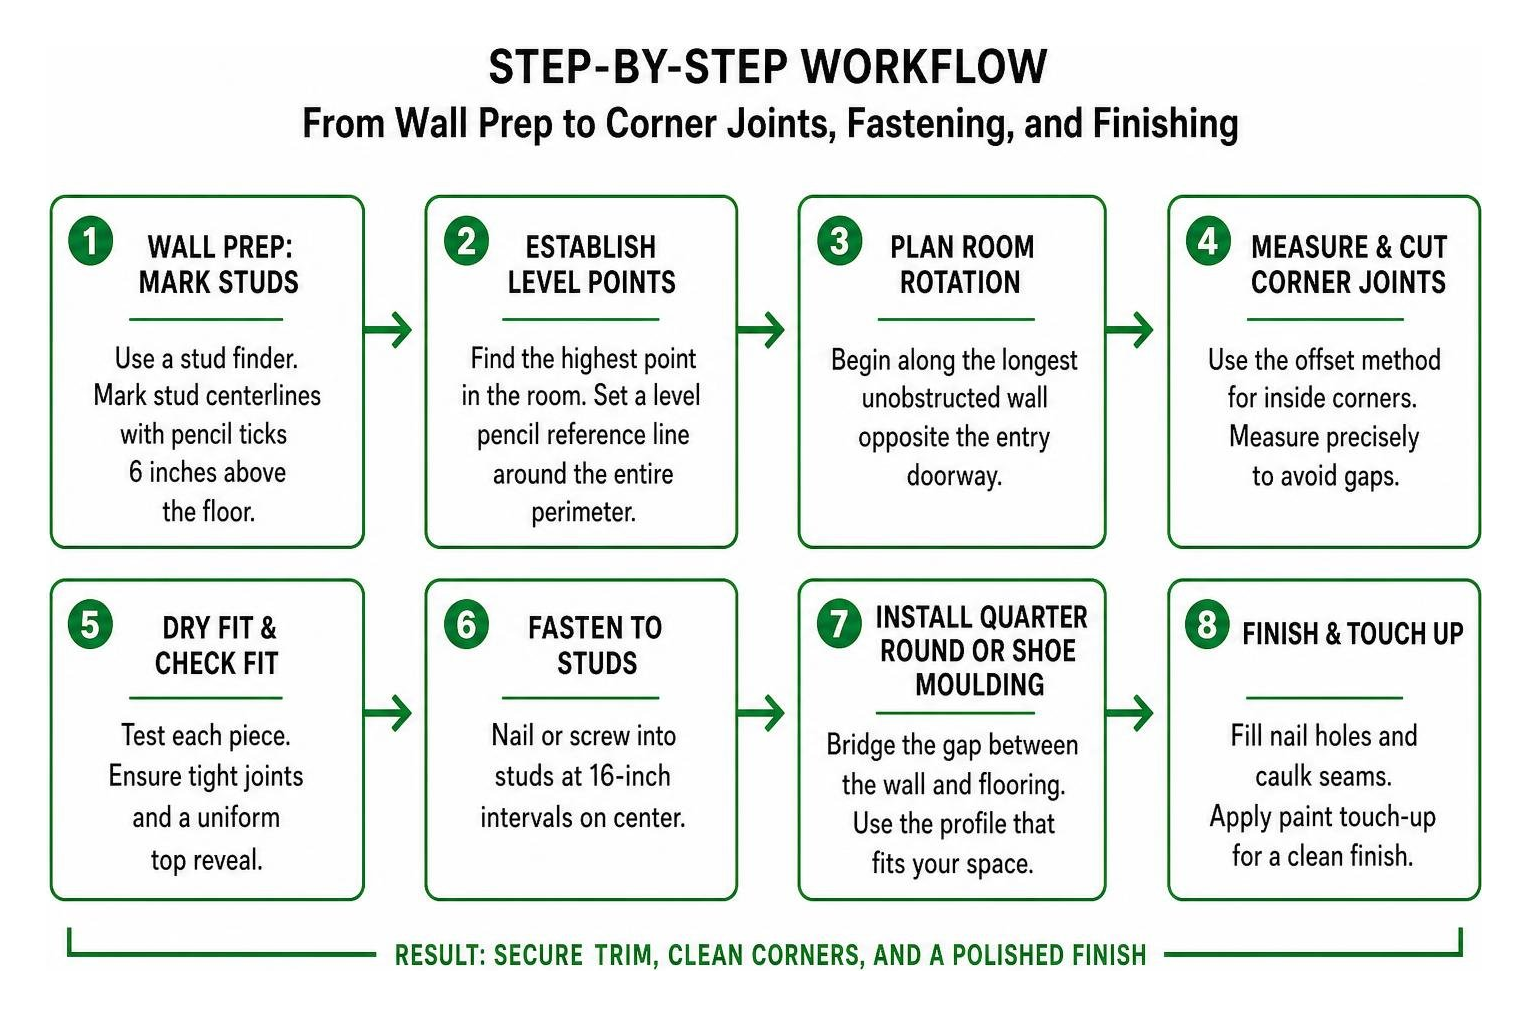
- Mark Framing Members: Run a magnetic or electronic stud finder along the lower perimeter of the wall. Mark stud centerlines with light pencil ticks roughly 6 inches above the floor so your visual references remain visible when wide trim is set against the wall. Studs sit at 16-inch intervals on center along modern interior framing.
- Establish Level Points: In older structures or rooms with settled foundations, floors rarely sit dead level. Use a 48-inch or 72-inch spirit level along with a scrap piece of baseboard to find the highest point in the room. Set a level pencil reference line around the entire perimeter starting from this high marker. Refer to expert guidance on baseboard installation to maintain a uniform top reveal throughout adjoining hallways.
- Plan Room Rotation: Begin installation along the longest unobstructed wall opposite the entry doorway. This placement ensures that any coped joints face away from primary sightlines.
Accurate Measuring and Cutting Corner Joints
Corner angles in homes rarely form a pristine 90-degree angle. A tiny corner variance compounds quickly across a long wall run, producing unsightly gaps if not measured precisely.
For measuring inside corner spans without bending your tape into the seam, use the offset method: measure out exactly 10 inches from one corner and place a crisp pencil hash mark on the wall. Measure from the opposite corner to your mark, then add 10 inches to determine the final dimension.
- Inside Corners (Solid Wood): Inside corners should be coped. First, run your initial board straight into the adjoining wall. Cut the mating board on your miter saw at an inside 45-degree angle. Darken the revealed decorative wood edge using a pencil lead held flat against the cut. Follow this highlighted contour with a coping saw, angling the blade back roughly 30 degrees to back-bevel the wood behind the leading profile face. The front edge will drop seamlessly over the flat face of the first board. Learn more about cutting baseboard trim to execute these joints efficiently.
- Inside Corners (MDF): Medium-density fiberboard can crumble under fine coping saw teeth. When working with MDF, measure the exact angle using an angle finder, divide by two, and make matched miter cuts joined with PVA wood adhesive.
- Outside Corners: Outside corners require precision miters. Measure to the sharp outside corner of the drywall, mark the back edge of your trim piece, and cut both mating pieces at 45 degrees. Cut pieces roughly 1/16-inch long so they spring together tightly. Explore precise baseboard corner cuts for advanced adjustment tips.
- Long Wall Runs (Scarf Joints): When a single wall span exceeds the length of your longest trim board, connect two boards using a 45-degree scarf joint centered over a framing stud. Glue the bevels together and secure them with finish nails driven through the overlapping joint into the stud.
Fastening Techniques When Installing Baseboards and Quarter Round
Baseboard requires solid mechanical anchorage to pull straight against wavy drywall. Standard drywall measures 1/2-inch thick, and baseboards range from 3/8-inch to 5/8-inch in thickness. Using 15-gauge or 16-gauge finish nails that are 2 to 2-1/2 inches long ensures your fasteners bite at least 3/4 inch into structural wall studs and sole plates.
Drive two nails at each stud location: one angled slightly upward into the stud framing roughly 1 inch below the top profile, and one driven low through the bottom 1-1/4 inches directly into the horizontal bottom wall plate. Setting fasteners in an alternating, subtle cross-pattern locks the trim firmly against framing bows. If drywall mud buildup at the floor causes the board to kick out at the bottom, install a drywall screw into the framing behind the baseboard and back it out slightly to create an even, plumb backing stop before nailing. For comprehensive wall prep, read through proper baseboard trim attachment.
Step-by-Step Quarter Round Installation Process
Once the baseboard is installed and secured, quarter round creates the final protective transition along your floorboards.
- Measure and Sequence: Calculate total linear trim needed around the room perimeter (for example, a 10 by 10 room with two 36-inch door openings). Add 10% extra material to account for miter offcuts. Cut your longest wall pieces first, using remaining offcuts for short wall returns.
- Dry Fit the Perimeter: Cut pieces slightly long and test-fit adjoining joints dry around the room perimeter before applying mechanical fasteners.
- Fasten Securely: Align the profile tight against the baseboard and floor. Drive 1-1/4-inch to 1-1/2-inch 18-gauge brad nails through the quarter round directly into the baseboard at a horizontal or subtle 45-degree upward angle. Space nails every 16 to 20 inches along the run, placing fasteners no closer than 2 inches from board ends to prevent splitting.
Best Practices for Installing Baseboards and Quarter Round on Uneven Subfloors
Flooring slopes or subfloor undulations can leave unsightly gaps beneath baseboards. If a floor dips significantly along a span:
- Scribing the Baseboard: Set the baseboard in place resting on the highest spot of the floor. Set a compass or pencil-holding scribe guide to match the largest gap under the board. Run the tool along the floor contour, transferring that irregular line onto the bottom face of the baseboard. Cut along the scribed line with a jigsaw or circular saw back-beveled at 5 degrees, allowing the top edge to remain level while the bottom hugs the floor.
- Conforming Quarter Round: Quarter round provides natural vertical flexibility. Apply steady downward hand pressure while driving your 18-gauge brads into the baseboard. The profile will trace the subtle rise and fall of the floor without cracking. Consult trade guidance on trim installation for tackling severe floor slopes.
Proper Fastening and Corner Transitions
- Terminating at Door Casings: When quarter round reaches a door casing that is thinner than the trim profile, a blunt butt cut leaves an unpainted, exposed profile end. Instead, cut a 45-degree outside miter on the end of the quarter round stick, and glue a tiny mitered wedge (a “return”) back toward the wall surface. This caps the profile cleanly without creating an overhang.
- Fastener Positioning: Always direct fasteners exclusively into the vertical baseboard or wall sole plate—never drive a nail downward into the flooring itself. Floating laminate, luxury vinyl, and hardwood floors require room to move beneath the trim. Review avoiding common trim installation errors to protect your flooring warranty.
Professional Finishing: Filling, Caulking, and Painting
A trim carpentry project looks only as sharp as its finishing details. Clean patching and straight caulk lines transform individual wood pieces into a unified architectural feature.
- Countersink and Fill: Ensure all nail heads sit roughly 1/16-inch beneath the wood surface. If any nails remain proud, tap them down gently using a dedicated nail punch. Overfill nail divots slightly using a high-density wood filler or spackling paste. Once fully dry, sand the filler smooth using 220-grit sandpaper so the patch blends flush with the surrounding wood grain.
- Caulk Wall and Miter Seams: Apply a smooth, continuous bead of paintable acrylic latex or elastomeric caulk along the top joint where the baseboard meets the drywall, inside corner joints, and where quarter round meets the baseboard face. Smooth the bead with a clean, damp finger or edging tool, removing excess material immediately.
- Protect the Floor During Final Touch-Ups: Avoid caulking the bottom joint between the quarter round and a floating floor, which can restrict material movement. To protect prefinished floors during touch-up painting, roll out a 10-inch strip of kraft paper or rosin paper tucked flat along the base before fastening, or apply low-tack painter’s tape to the floor surface. Brush on your final coat of enamel paint over the filled holes and caulked seams, pulling tape away while the paint is still slightly damp.
Frequently Asked Questions About Trim Moulding
Should Quarter Round Be Nailed to the Wall Baseboard or the Flooring?
Quarter round must always be nailed directly into the vertical baseboard or wall framing, never down into the subfloor or flooring planks. Floating floors (such as luxury vinyl, laminate, and engineered hardwood) expand and shrink laterally as ambient indoor temperatures and humidity shift. Nailing trim directly into the floor pins the material in place, which can lead to severe buckling, peaked seams, and voided manufacturer warranties.
Is Quarter Round Required for Every Baseboard Project?
Quarter round is not mandatory for every room. If you install new, thick baseboard over completely flat subfloors after laying new flooring, the baseboard alone can easily conceal the perimeter expansion margin. However, when baseboards are installed before flooring, or in older homes with settling foundations and uneven floor joists, flexible quarter round or shoe moulding provides an attractive solution to hide inconsistent gaps without tearing out existing trim. You can browse various moulding and baseboard choices to see standalone baseboard profiles versus multi-piece assemblies.
Should Inside Baseboard Corners Be Coped or Mitered?
Inside corners on solid wood trim should always be coped rather than mitered. Walls rarely form a true 90-degree angle due to uneven drywall mud buildup in corners. A coped joint seats tightly over out-of-angle corners and remains closed when wood expands and shrinks seasonally. For medium-density fiberboard (MDF) profiles, which can fray when shaped with a coping blade, cutting matching miter angles joined with wood glue is the preferred installation method.
Conclusion
Installing new baseboard and quarter round provides an immediate upgrade to your home’s interior, framing every room with clean lines and balanced proportions. Taking time to acclimate wood, locate wall framing, cope inside joints, and fasten profiles at the proper angles guarantees a durable, gap-free result that withstands seasonal movement.
When planning your next trim upgrade or renovation project across Schiller Park, Chicago, Elk Grove Village, or nearby communities, browse our premium baseboard moulding collections at K&B Direct. We supply premium interior mouldings, solid doors, and kitchen and bathroom products designed to bring lasting quality to your home.